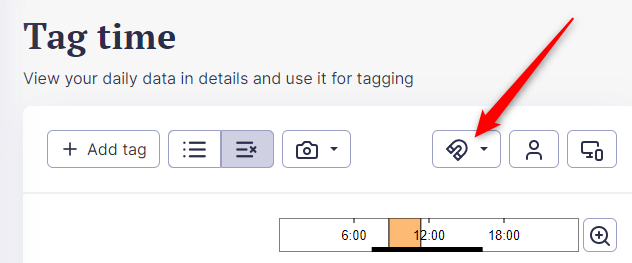
Click on Personal, then "Tag time" on the left. You should see a familiar ManicTime timelines view.

Tagging is the most important concept in ManicTime, you use it to keep track of how you spent your time. All the data ManicTime collects, should help you figure out when you were working on some task.
Selecting time for tagging
When you want to tag some time, you must first select it. To select time, drag on the timelines (hold down left mouse button while moving the mouse over the timelines). While you are moving your mouse over the timelines, you will notice a tooltip which tells you more about the underlying activity. Mouse will snap to starts and ends of activities so you can easily select whole activities.
To tag some time, drag over the timelines to select time, then click on Add tag and choose a tag.
Selecting full minutes
If you want your selection rounded to a minute, you can drag on the time timeline (time bar displayed just above the timelines), mouse will snap to minutes, so the final selection will be rounded to the full minute.

By default it will snap to 1 minute, but you can change this to 2, 5, 10 ... You can change in Tag time if you click on the magnet icon.
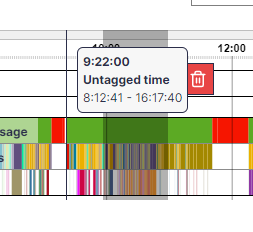
Selecting untagged time
Day view also shows untagged time. Untagged time is all Active time, which was not tagged. Click on gray box showing untagged time to make a selection and tag.

Selecting time based on details
When you click on one of the timelines, bottom part will show details for that timeline. You can switch details to another timeline by clicking on that timeline or by using dropdown for selected device and timeline below.
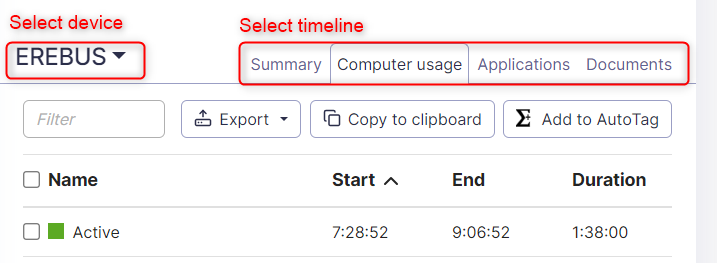
Summary view will show summary of all timelines for the selected device.

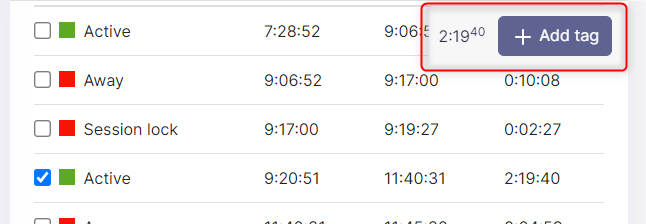
On all bottom views you can make time selection by clicking on check-boxes. If you prefer tagging this way, then when you scroll down, an Add tag button will appear.
Tagging
Before you start with tagging, take some time to think about how you want to structure tags. Imagine that tags represent your work. Our suggestion is to go from most general to the more specific ones.
So for example if I asked you what you were doing for the past two hours, you might answer, 'I was working on design for our new site'. You could tag this as
Our company, WebSite, Design
Or you might say 'I was on a support call for Client X'. So tag would be
Client X, Support, Phone call
Or you might say 'I was at a meeting with Client X where we discussed deadline for Project Y'. So tag would be
Client X, Project Y, Deadline discussion
Or you might say 'I was taking a lunch break, I ate at McDonald's and had a Big mac'
Lunch break, McDonalds, Big mac
If you don't want to track what you ate, you could also just say
Lunch break, McDonalds
Similarly, maybe you don't care about where you ate, just that you were on a Lunch break, so you would use
Lunch break
You can include as many tags as you want, just make sure you keep the same order, it will make things easier in the future. So if Client X is always starting tag, make sure it is always the first tag when you work for Client X.
So now that we know the theory behind tagging time, how do we tag time? Once you select some time, you can:
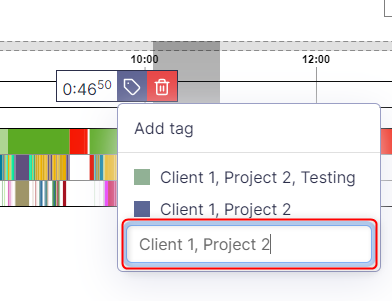
- Click the tag button which shows up when you stop dragging a selection
- Click on Add tag button to open Add tag window. Type the tag into the text-box
- Use tag shortcuts
Tag shortcuts
For quick tag entry you can assign shortcuts to your most used tags. To define a shortcut, click on a tag to select it, then click on "A" icon.
 |
| Create a tag shortcut |
Select a number to associate with that tag. Now just make a selection by dragging on the timelines and press the number you selected.
 |
| Press a number you assigned to a tag |
Deleting data
To delete data, make a time selection, then click on Trash icon.
If time is already tagged you might not be able to select it. To select already tagged time, click on gear icon above timelines on the right and then for setting When making time selection it should select Select all time.

Zoom
To zoom, move the sliders in the Zoom control. You can also click on the gray box and move whole selection left or right. Clicking on the zoom icon on the right will switch to auto zoom.

Tag filter
Tag filter will allow you to quickly filter the list of previously used tags.
 |
| Filter previously used tags |
It only shows up when you have 3 or more previously used tags.
Productivity timeline
If you have productivity set in Reports -> Productivity, then a new Productivity timeline will show up on Personal, Day view. Productivity timeline shows productive time (green) and unproductive time (red). Neutral or un-assigned time is not displayed (white).
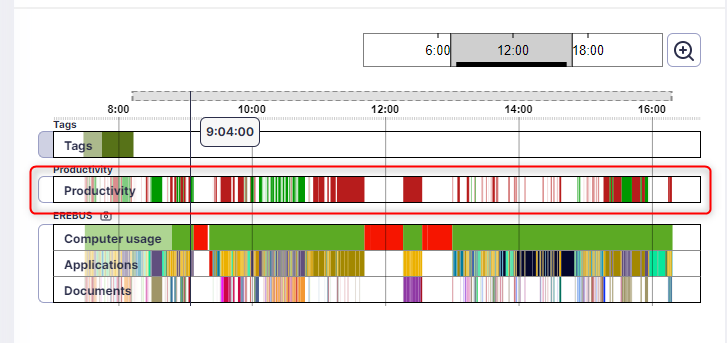 |
| Personal productivity timeline |
Administrators can also see productivity timeline for all users on the server. To see productivity timelines for all users, go to Reports -> Timelines and on the top right side choose to display Productivity timelines.
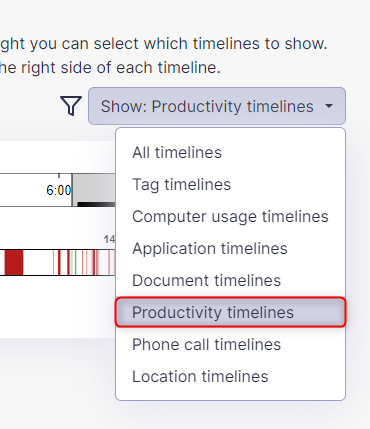 |
| Productivity timelines for all users on the server |