Warning: Because screenshots can take up a lot of space, ManicTime will store screenshots for the past 7 days (default setting). You can change that in Settings, Screenshots
To enable screenshots, open Settings -> Screenshots and check Enable screenshots.
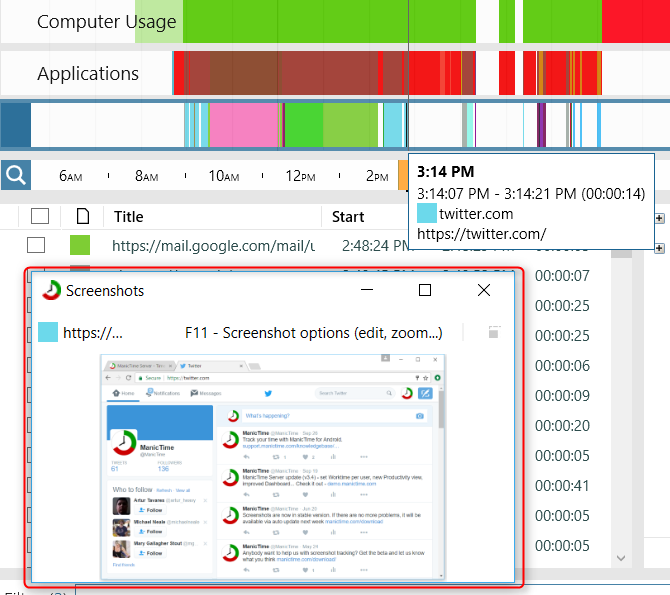
Screenshots are visible on Day view. By default, they will be visible in the tooltip.
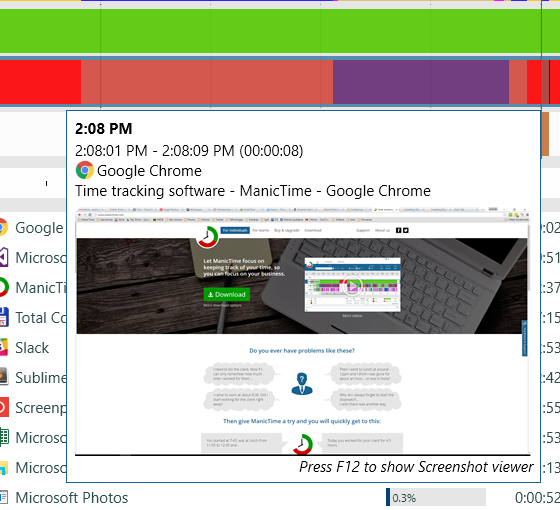
Moving your mouse over the timelines or Day view details will update the screenshot.
Screenshot viewer
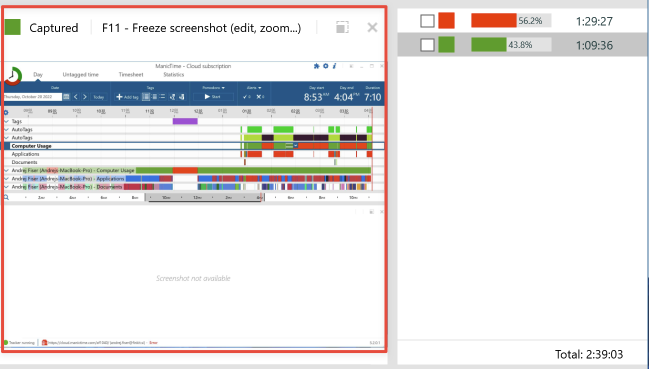
If you press F12, screenshots will show up in bottom half of ManicTime or in a dedicated window.
Screenshots docked in bottom part of ManicTime window
You can dock screenshots to bottom left, bottom right or full bottom part.
 Screenshots docked in full bottom part
 Screenshots docked in bottom left part
 Screenshots docked in full bottom right part
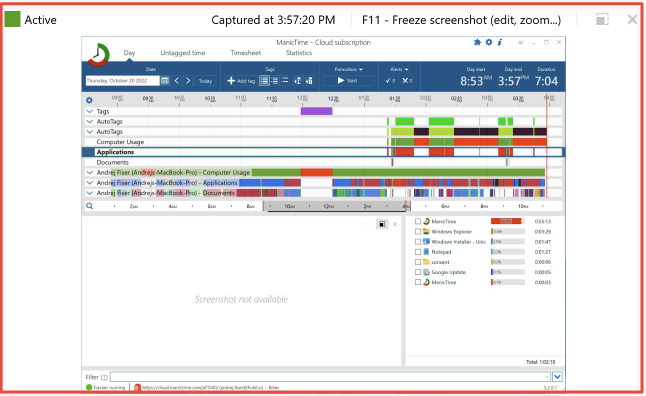
Screenshot viewer in a dedicated window
Those with two or more monitors will find dedicated window handy. Dedicated window stays open on next launch if you don't close it.
Screenshot viewer in another window
To toggle between screenshot viewer in a window or as part of the bottom section of ManicTime, click on gray square icon.
Toggle screenshot viewer (dedicated window <-> bottom section of ManicTime)
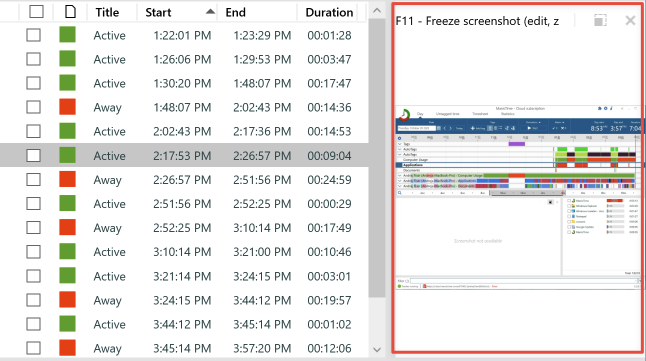
Freezing screenshots (zoom, edit, copy, next, previous, delete...)
To get to the screenshot toolbar menu (zoom, edit, copy...), press F11 while viewing a screenshot. This will freeze the screenshot, which will allow you to use the toolbar below.
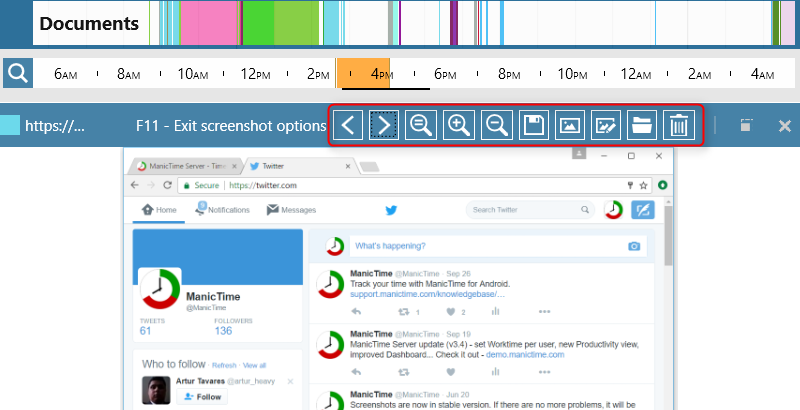
Screenshot options
You can:
- Zoom - use mouse scroll to zoom
- Pan - hold down left button and drag
- Zoom 1:1 - zoom to native resolution
- Navigate to previous or next screenshot - left/right cursors keys or CTRL-mouse scroll
- Save as - opens a Save as dialog
- Copy to clipboard - copies image to clipboard
- Open in default viewer - opens image in default viewer
- Open in default editor - opens image in default editor
- Delete screenshot - deletes the image from disk
Screenshot tagging
While screenshot is freezed, you can now hold down Shift (or CTRL for multi selection) and press cursor keys. This will start a time selection, which you can then use for tagging.
Screenshot filtering
While screenshot is freezed, and you navigate between screenshots, it will only show screenshots for specified Day view filter. For instance this would make searching for snapshots of the specific file you may have lost much easier.
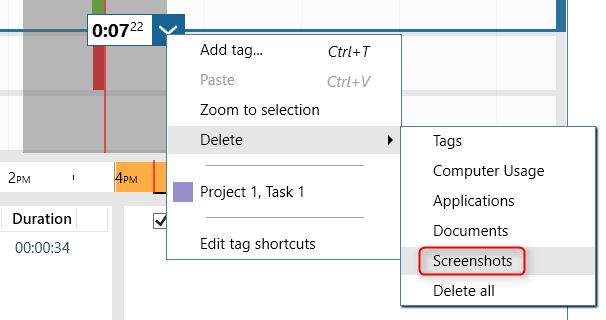
Delete screenshots
You can now delete screenshots by making a selection, then go to Delete -> Screenshots. Delete -> All will also delete screenshots.
Do not record screenshots for specific processes
You can set ManicTime to not record screenshot for specific process. The easiest way to do this is from Day view. Right click on the process, then choose Tracking -> From now on stop recording "Process name" screenshots.
After that ManicTime will ask you if you also want to delete existing screenshots for this process.
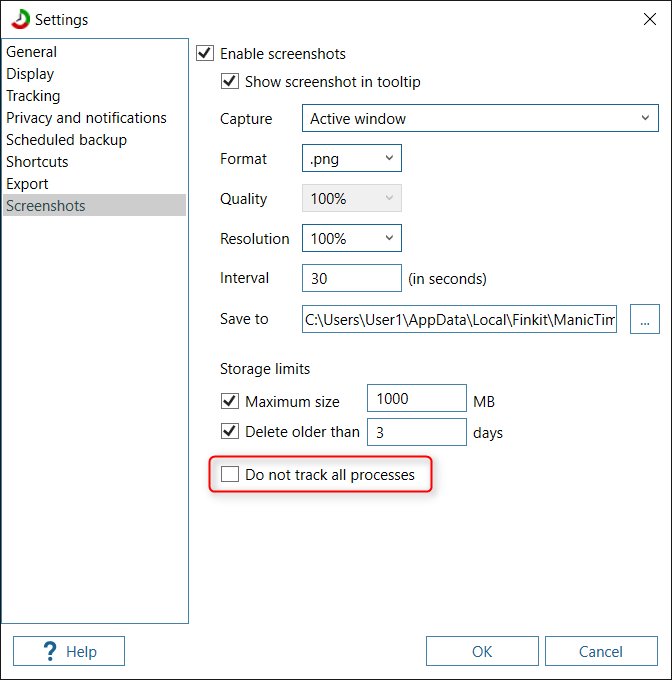
In Settings, Screenshots you can also make changes which processes ManicTime should/shouldn't take screenshots for.
Screenshots settings
By default, ManicTime will take a screenshot every 60 seconds of any application you use. You can restrict ManicTime to only take screenshots of specific applications. For example screenshots are very useful in remote desktop applications like Remote desktop, TeamViewer, where ManicTime doesn't show a lot of data.
Screenshots from server
If a device is publishing screenshots to ManicTime Server, then when you load timelines from ManicTime server screenshots will be shown when you mouse over the timeline coming from ManicTime Server.