Tagging is the most important concept in ManicTime, you use it to keep track of how you spent your time. All the data ManicTime collects, should help you figure out when you were working on some task.
When you want to tag some time, you must first select it. You can click on Add tag button without a selection and enter the time manually, but this is slow and inaccurate.
The best way to select time in ManicTime is to drag on the timelines (hold down left mouse button while moving the mouse over the timelines). While you are moving your mouse over the timelines, you will notice a tooltip which tells you more about the underlying activity. Mouse will snap to starts and ends of activities so you can easily select whole activities.
If you want your selection rounded to a minute, you can drag on the time timeline (time bar displayed just above the timelines), mouse will snap to minutes, so the final selection will be rounded to the full minute. By default it will snap to 1 minute, but you can change this to 2, 5, 10 ... minutes in Settings, Display.
 You can also select time by checking check-boxes in the details or the summary view below the timelines.

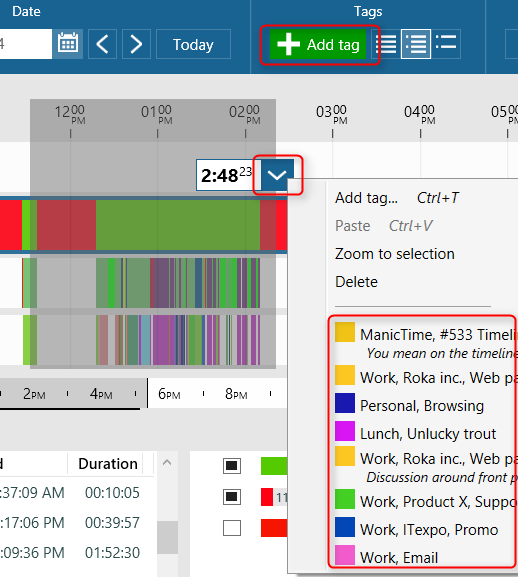
Once you select some time, click on down arrow at the end of selection or Add tag button.

Before you start with tagging, take some time to think about how you want to structure tags. Imagine that tags represent your work. Our suggestion is to go from most general to the more specific ones.
So for example if I asked you what you were doing for the past two hours, you might answer, 'I was working on design for our new site'. You could tag this as
Our company, WebSite, Design
Or you might say 'I was on a support call for Client X'. So tag would be
Client X, Support, Phone call
Or you might say 'I was at a meeting with Client X where we discussed deadline for Project Y'. So tag would be
Client X, Project Y, Deadline discussion
Or you might say 'I was taking a lunch break, I ate at McDonald's and had a Big mac'
Lunch break, McDonalds, Big mac
If you don't want to track what you ate, you could also just say
Lunch break, McDonalds
Similarly, maybe you don't care about where you ate, just that you were on a Lunch break, so you would use
Lunch break
You can include as many tags as you want, just make sure you keep the same order, it will make things easier in the future. So if Client X is always starting tag, make sure it is always the first tag when you work for Client X.
So now that we know the theory behind tagging time, how do we tag time? Once you select some time, you can:
- Click on Add tag button to open Add tag window. Type the tag into the text-box
- Type Alt-T to open Add tag window. Type the tag into the text-box
- Click the down arrow on the selection and choose one of the previously used tags (or right click on selection to get the same menu)
- Click on one tag to select it, type Ctrl-C, then select some time and type Ctrl-V
- Use tag shortcuts
Edit, Delete a tag
To edit a tag, right click a tag on the Tag timeline and choose Edit.
To delete a tag, right click a tag on the Tag timeline and choose Delete.
For tag reports see Timesheet.
Tag picker
In terms of ManicTime, tags are some text values separated by a comma. Let's say you have these tags:
Client 1, Project 1
Client 1, Project 2
Client 1, Project 2, Activity 1
We could write these same tags as a hierarchy like this:
Client 1
    Project 1
    Project 2
        Activity 1
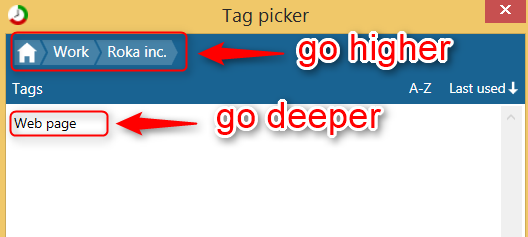
To open Tag picker, click on a hierarchy icon in Tag window.
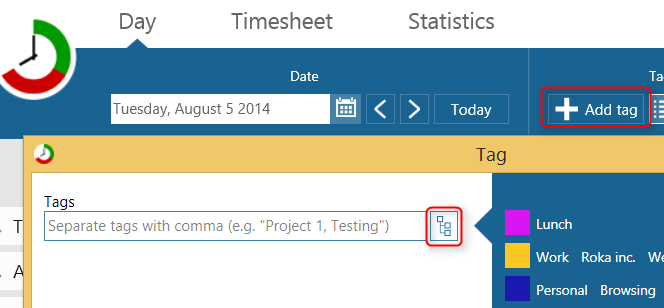
Tag picker will present the tags in a hierarchy view. You can click on the tags to go deeper in the hierarchy, or on the bread crumbs control above to go higher. When you find the correct tag, click Ok and it will be inserted into Tag view.
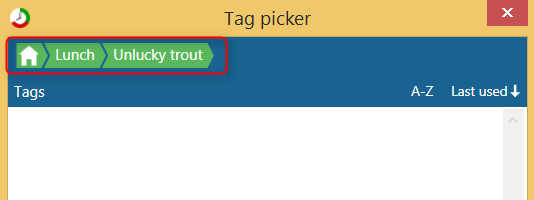
In a single user scenario, Tag picker will show previous tags you've used. When ManicTime is connected to the ManicTime server, it will also show all the tags defined on the server. So when it is connected to the server, it is a great tool for tag discovery.
If ManicTime is connected to ManicTime server, then tags in breadcrumb control will turn green when they are allowed.
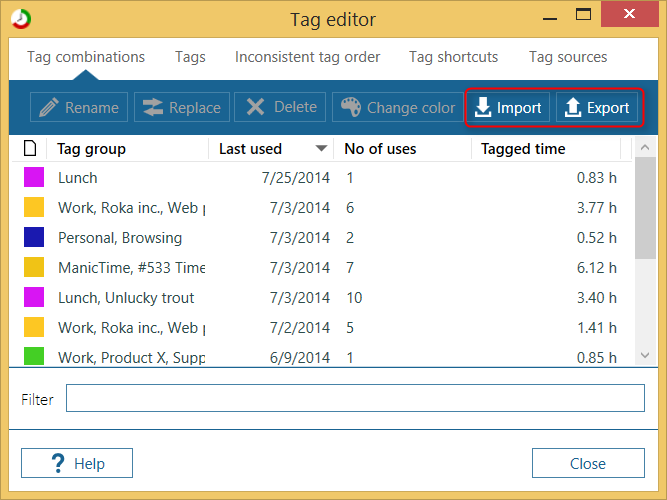
Tag editor
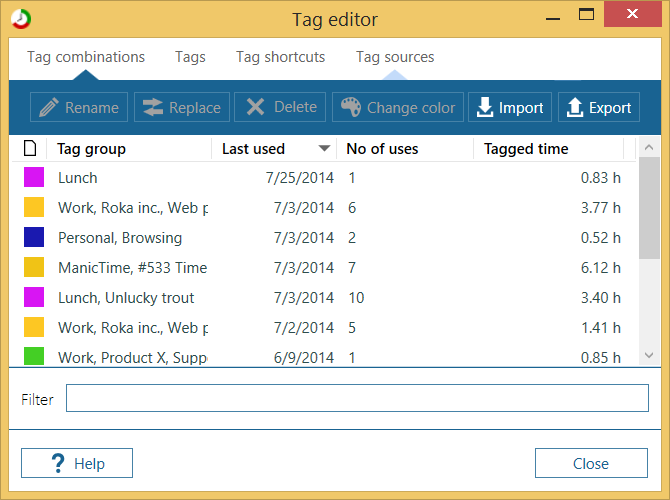
You can use Tag editor for all sorts of tag operations - rename, change color, delete, change ordering...
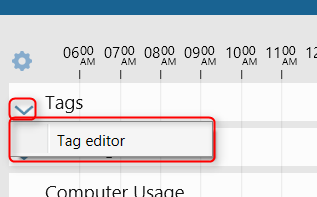
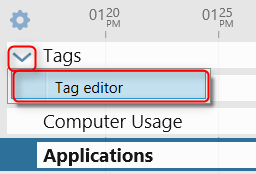
To open Tag editor, click on down arrow on the left side of Tag timeline and choose Tag editor.
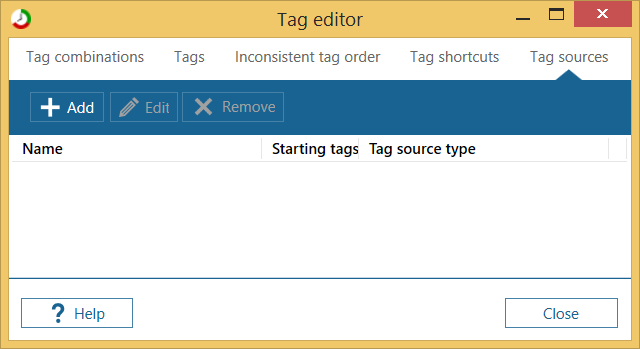
There are four tabs:
- Tag combinations
- Tags
- Tag shortcuts
- Tag sources
Tag combinations
In ManicTime, tags are separated with comma, for example:
- Project 1, Testing
- Project 1, Design
- Project 2, Design
- Project 2, Testing
In above example tag combinations are:
- Project 1, Testing
- Project 1, Design
- Project 2, Design
- Project 2, Testing
while tags are
- Project 1
- Project 2
- Design
- Testing
To illustrate the difference between renaming tag combinations and tags lets consider this.
Lets say we want to rename Project 1 to Project Alpha. Since Project 1 is used in two tag combinations, it is best if we rename it on Tags tab. So just renaming Project 1 to Project Alpha all tag combinations which use Project 1, will be renamed to Project Alpha:
- Project Alpha, Testing
- Project Alpha, Design
But if we want to change 'Project Alpha, Testing' to 'Project Alpha, UI testing' and leave 'Project 2, Testing' intact, we need to rename it on Tag combinations tab.
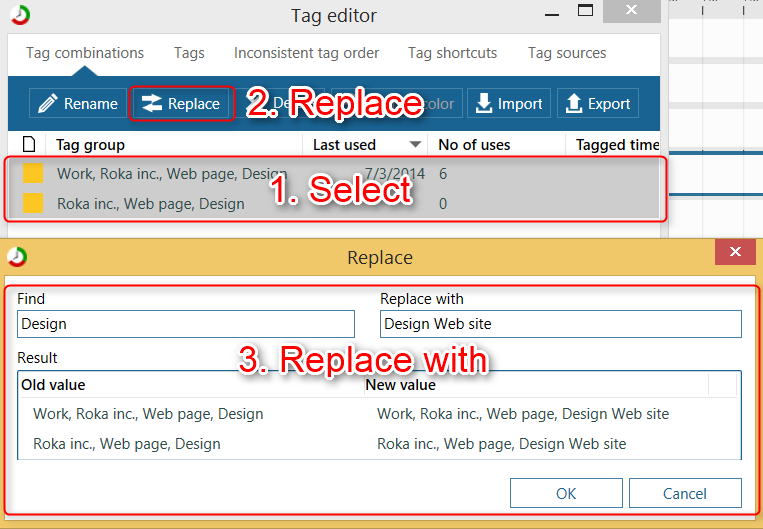
Multi rename with replace
With Replace you can rename multiple tag combinations at once. To do this:
Select tag combinations (hold down Shift or Ctrl and click items to select more than one)
Click Replace
In Find type the text you want to replace, in Replace with text you want to replace it with.
In the list below you will see what it will look like after you press Ok.
Changing color of tags
Before we go into how you can change tag colors lets spend a few words on how ManicTime calculates tag colors. When we started out, our first idea was to have a random color for each tag combination. We soon realized that it was to random, so we decided to show the color of first tag. This means that in ManicTime each tag has its own color. For example lets say we have these tags with corresponding colors:
- Project 1 (red)
- Project 2 (blue)
- Design (Yellow)
- Testing (Orange)
Then if we have these tag combinations they will be the following color:
- Project 1, Testing (red)
- Project 1, Design (red)
- Project 2, Design (blue)
- Project 2, Testing (blue)
So you will only see colors red and blue. Design and testing are never first tags, so their colors never count. If we made a tag 'Design, Project 1', Design would be the first tag so it would be yellow.
We can change the color from:
- Tag editor - Select a tag, then click Change color.
- Right click on tag in Day view, go to All instances of ... -> Change color
Lets say we want to change color of 'Project 1, Testing'. Within Tag editor, we select the tag and click Change color:
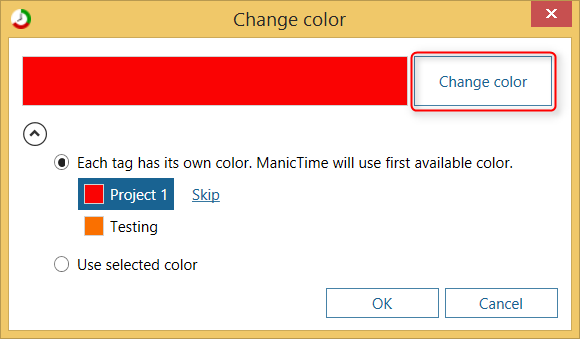
Lets say we want to change the color to green.
Because 'Project 1, Testing' still uses its default color calculations, for this color to change to green it has to change the color of Project 1. This has some side effects.
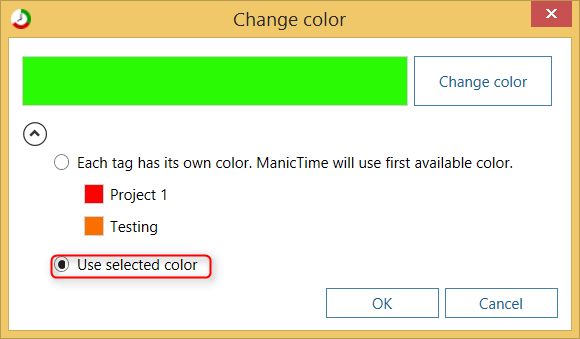
Because we changed the color of Project 1, we not only changed the color of 'Project 1, Testing', but we also changed the color of 'Project 1, Design'. If we want to just change the color of 'Project 1, Testing' we can do this by selecting 'Use selected color'. When we do this, color will only change for tag 'Project 1, Testing'.
Lets take one more example. Lets say we have these tags:
- Client 1, Project X, Design
- Client 1, Project Y, Testing
- Client 1, Project Z, Testing
- Client 1, Project Z, Design
In this case by default all colors will be the color of Client 1.
But what can we do if we want to have a different color for each project? We would have to assign each tag combination its own color. And we most likely have much more sub-tags than just two, so this would be a lot of work.
Remember when we discussed that each tag has its own color? So in above example Project Z has its own color, it is just not used because it is not the first tag. It would be great if we could somehow say, forget about the Client 1 color, just use colors of the next tag. We can do exactly that by choosing Skip next to Client 1.
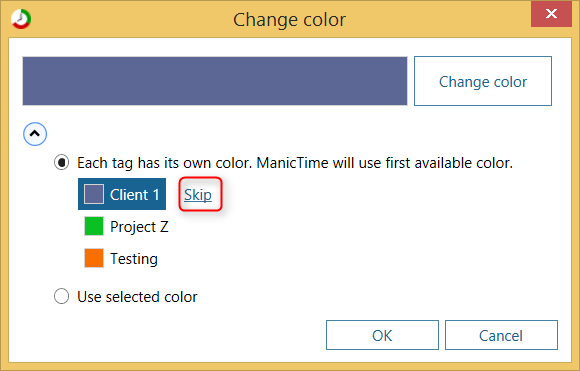
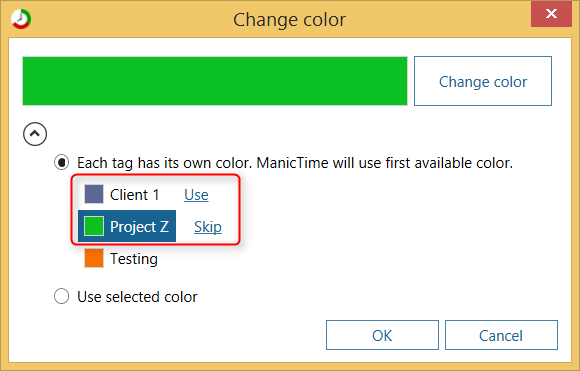
When we do this, Client 1 will never be used for color calculation, unless we tag some time with just Client 1.
Renaming tags
If you have a Pro version we suggest you use Tag editor to rename tags. In tag editor, you can go to Individual tags tab and rename Project Y to Project Z and it will be renamed in both instances.
The following works in all versions:
Let's say that at one point 'Project Y' was renamed to 'Project Z' and you would like to rename it everywhere you've used it in the past.
- Go to some day where that tag was used.
- Right click the tag on tag timeline and choose All instances of ... -> Rename.
- Type the new name and press OK.
Let's say you have these two tags:
Client X, Project Y, Deadline discussion
Client X, Project Y, Design
If you want to rename Project Y to Project Z, you need to rename both of them via All instances of... So you need to do this for every tag combination Project Y is a part of.
When you are renaming tags, if you leave Notes field empty notes will not be changed.
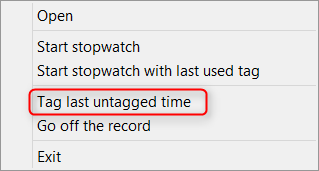
Tag last untagged time
A lot of times stopwatch is not very convenient, because you have to remember to start it and then also decide what you will be working on. A similar feature, which in a sense works backward, is Tag last untagged time.
When you create a tag using Tag last untagged time, its start time will be:
- If this is the first tag of the day, start time = Day start time (first interaction with computer)
- If tags already exist for today, start time = last tag end time
End time will be current time.
You can access this feature by right clicking ManicTime icon and choose Tag last untagged time.
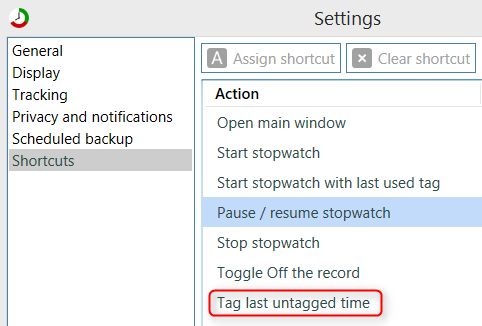
You can also add a global key shortcut and access it that way.
Tag shortcuts
For quick tag entry you can assign shortcuts to your most used tags.
To set up a shortcut, go to Settings, Application shortcuts and click on Add tag shortcut.
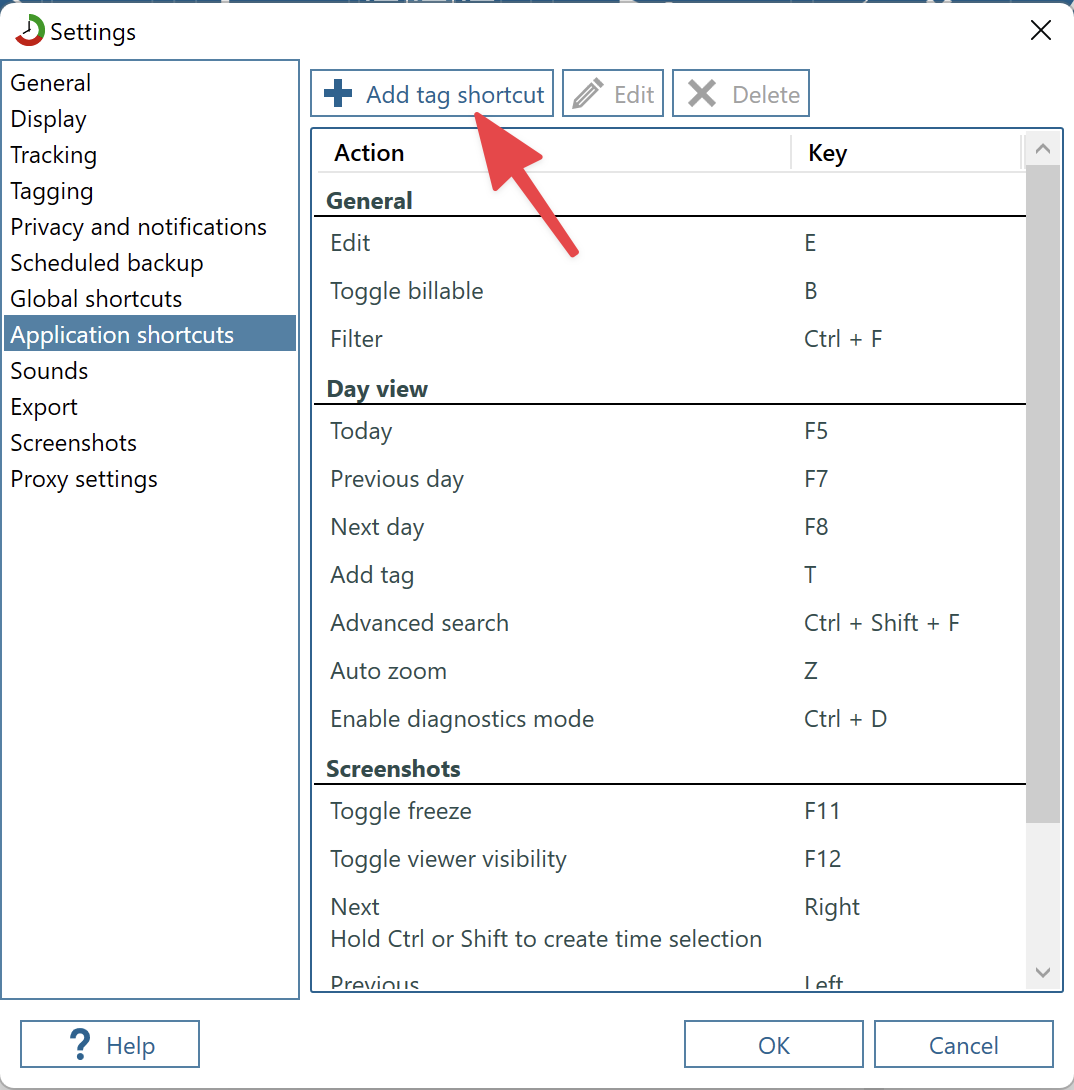
To add tag shortcut, click on Add tag shortcut.
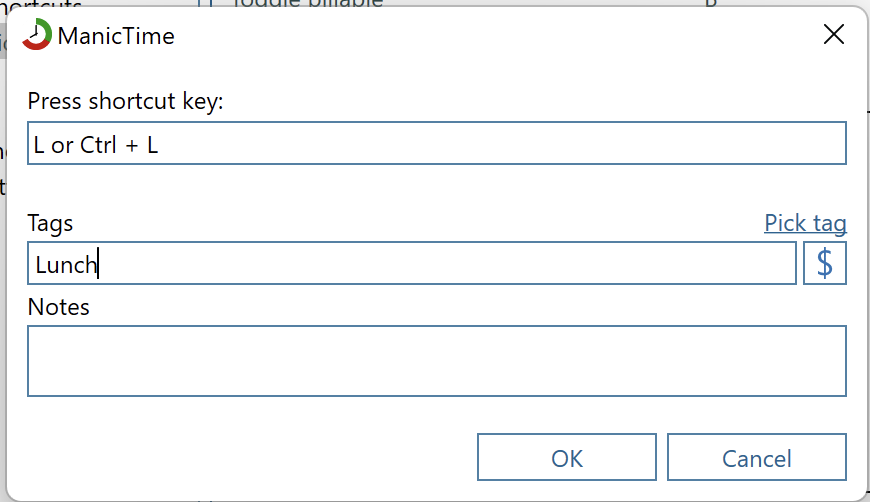
Type the key you want to use and the tag, in above case I want to use "L" to add a tag "Lunch".
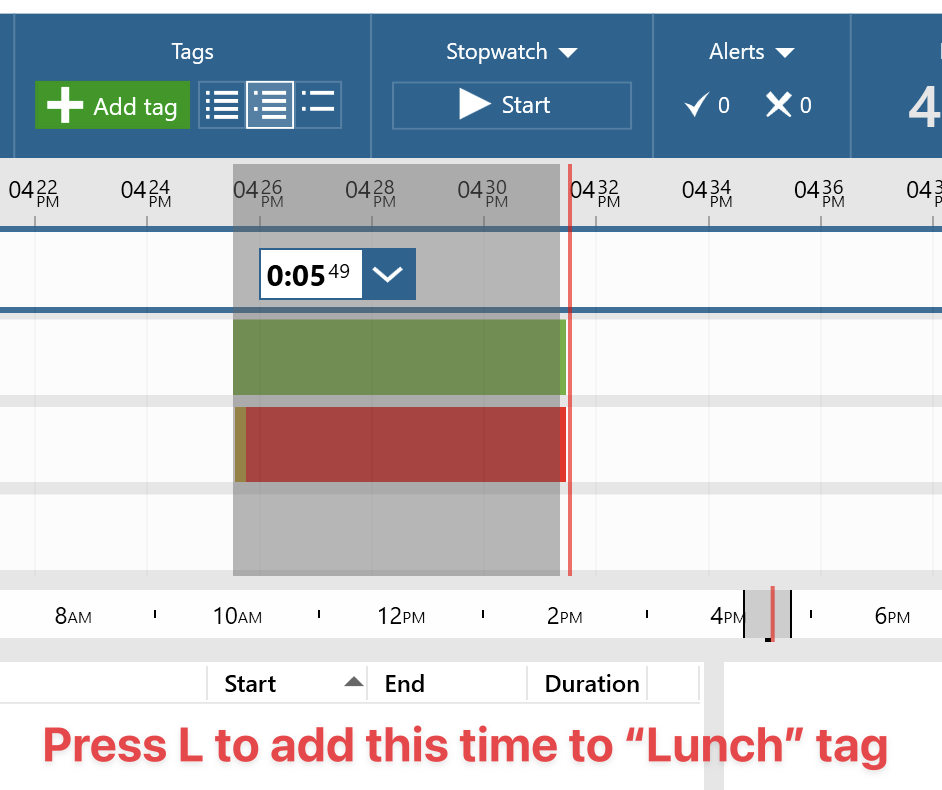
Then on day view, just select some time, and while time is selected type your key (in above example L). This will create the selected tag.
You can edit and delete tag shortcuts in Settings, Application shortcuts.
Billable tags
To mark tag as billable click on $ button next to Add tag text box.
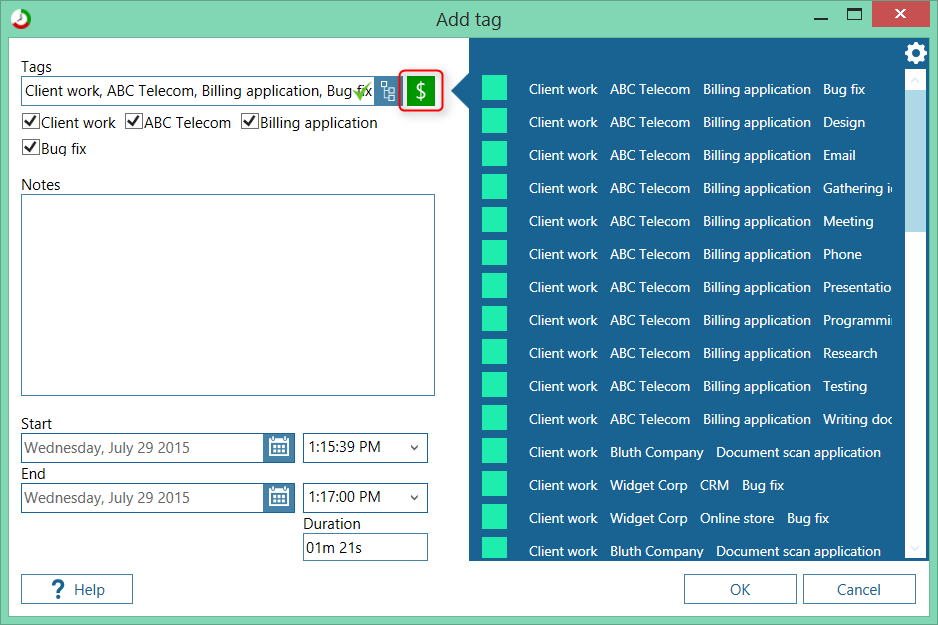
|
| Check $ button to mark as billable |
Billable tags will be marked with a Billable label.

|
| Tags marked with Billable label |
Billable label is also displayed in Recent tags menu
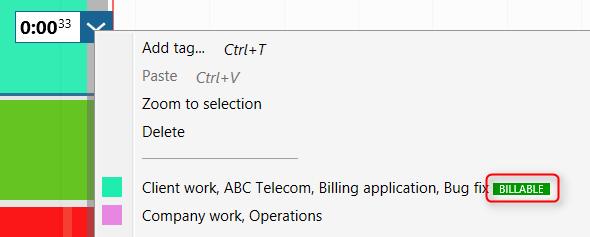
|
| Billable tags on Recent tags menu |
Billable by default
To make tags billable by default, go to Settings, Tagging and check "New tags are billable by default" option.
Toggling billable
You can toggle billable on multiple tags in bottom left part, right click and choose Set or Clear billable. You can also press CTRL-b to toggle set or clear billable.
|
| Toggling billable |
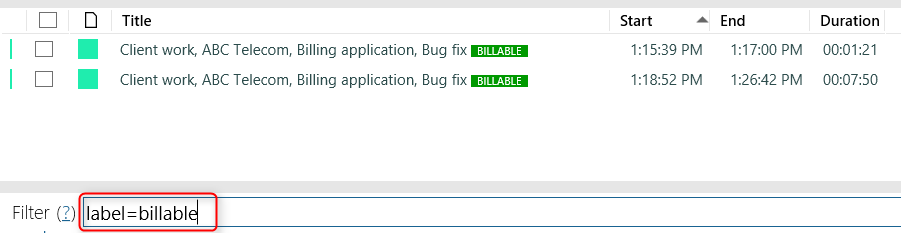
Filtering billable
If you want to show only billable tags type the following in filter:
label=billable
|
| Filter by billable |
Similarly you can show only non billable tags by typing:
-label=billable
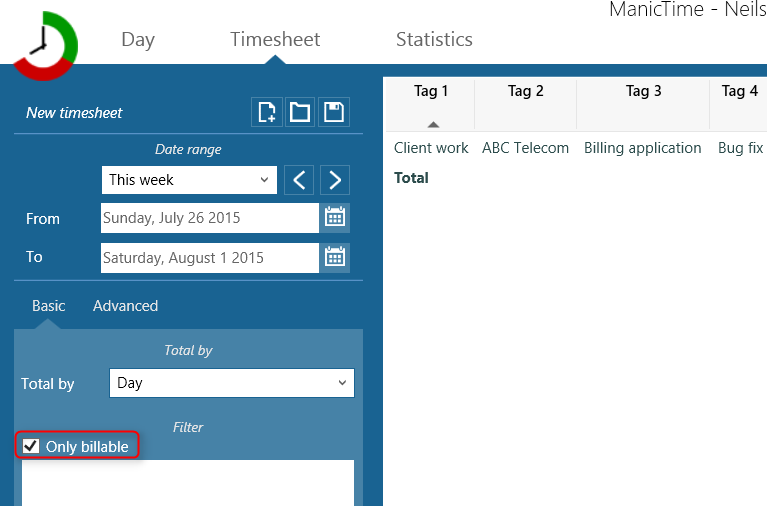
Reports for billable
In timesheet you can include only billable tags by checking Only billable checkbox. (you can also type "label=billable" in filter)
|
| Only billable tags on timesheet |
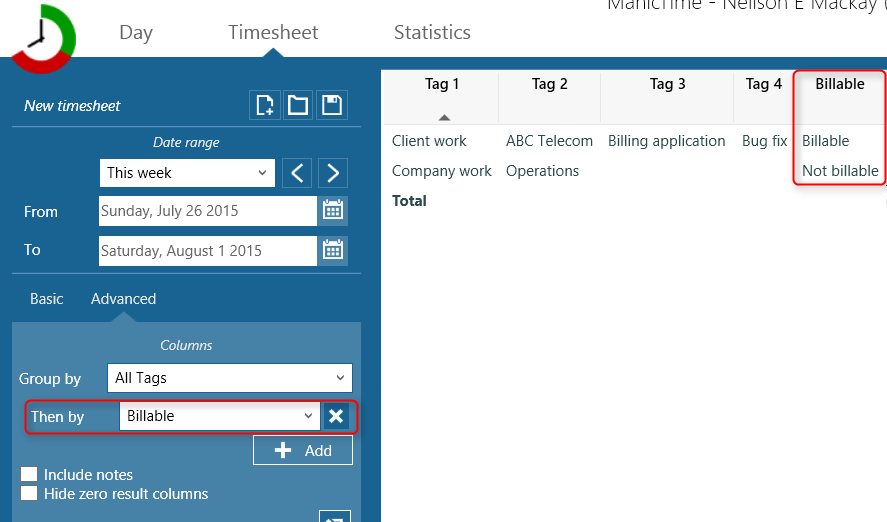
If you have billable and unbillable tags, you can add a billable column.
|
| Billable column on timesheet |
Billable tags will also be displayed in Statistics -> Combined groups.
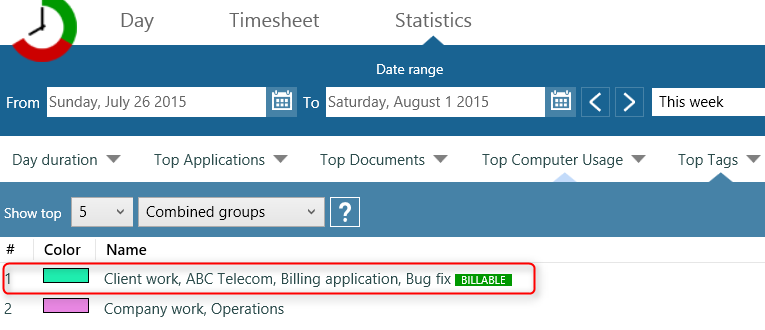
|
| Billable tags in statistics |
Deleting tags
Deleting individual tags
You can delete any tag on Day view by right clicking on it, then choose Delete.
You can also delete multiple tags by first selecting left of the three buttons next to "Add tag" button (Select all). Then drag to select time when you want to delete tags, click on selection button and Delete -> Tags.
You can also click on Tag timeline to select it, then delete tags in bottom left part.
Deleting tag combination
To delete all tags of Tag combination, go to Tag editor -> Tag combinations, select it and choose Delete. Deleting tag combination will also delete all activities.
Deleting tag
To delete a Tag, go to Tag editor -> Tags, select it and choose Delete.
Lets say we have these tag combinations:
- Project 1, Design
- Project 1
If we delete Project 1, all activities tagged with just Project 1 will be deleted, all activities tagged with 'Project 1, Design' will be changed to 'Design'.
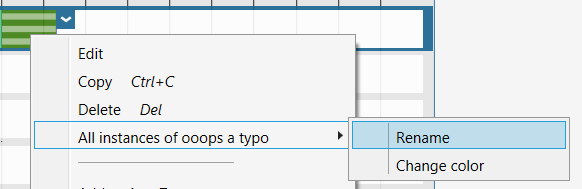
Fixing typos Sometimes you make a typo and that tag haunts you forever. In this case you can delete it in Tag editor -> Tags
In free version you can do the following to get rid of it:
- Create a tag with it.
- Then right click on the tag and choose All instances of ... -> Rename
- Rename it to some existing tag.
- Then just delete the tag you created.
After that it should not show up anymore.
Stopwatch
Use stopwatch when you want to time yourself during work.
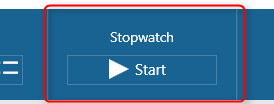
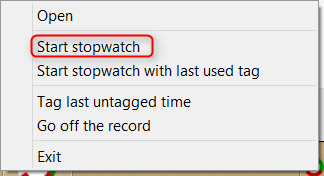
When you start working on task, click on Start stopwatch. The Add tag dialog will pop up. Write some tags about what you will be working on. When you click Ok, stopwatch will start running.
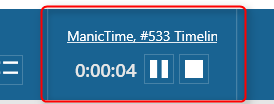 Once stopwatch is running you can pause or stop it. When you pause it, current tag will be saved and shown in the UI.
When you stop working on the task, click the Stop button.
To start or stop stopwatch you can also right click on the ManicTime icon in system tray and choose Start/Stop stopwatch.
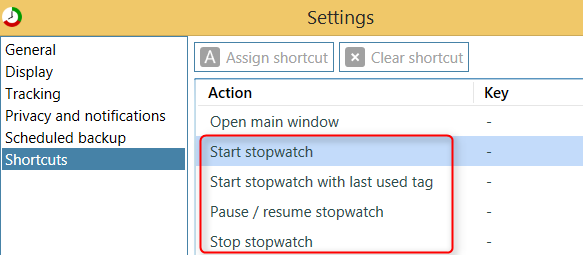
To start or stop stopwatch you can also use shortcuts which you can define in Settings.
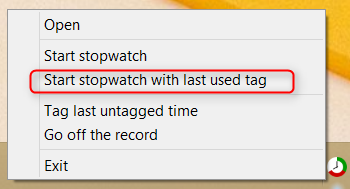
Start stopwatch with last used tag
Auto start the stopwatch with the last tag you’ve used for stopwatch. You can use a shortcut key.
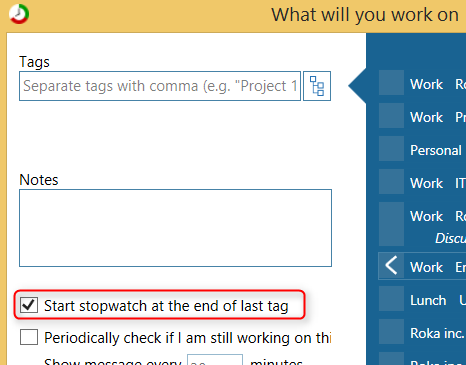
Start at end of last tag
When you start a stopwatch, you can check that it starts at the end of the last tag. If there is no previous tag on this day, it will start at current time.
What to do if you forget the stopwatch is running
Sometimes it’s easy to forget that the stopwatch is still running. There are a couple of ways to handle this:
- In Settings, Tagging, you can choose to automatically stop the stopwatch when inactivity is detected.
- When starting a stopwatch, you can enable a reminder that asks you every X minutes if you’re still working on the same task.
Timer and Pomodoro timer
Timer
Besides the stopwatch, there are two more options to time your work: Timer and Pomodoro timer.
Timer is a normal countdown timer. When it finishes, it stops and you have to start it again. To start a timer, click on Stopwatch text and choose Timer.
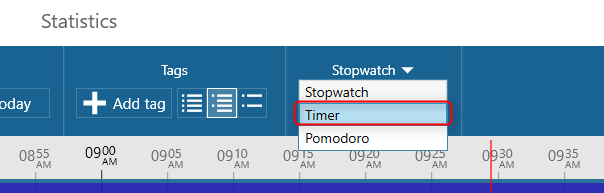
|
| Choose timer |
Then choose a tag and click Ok to start. When the time is up, it will save the tag and exit.
Pomodoro timer
There is a lot written about Pomodoro timer, so we will not go into much detail here. The idea is that you work for a specified amount of time (usually 25 minutes), then have a break. After the break you repeat the process, which gives you a nice work-break balance.
To use it, click on Pomodoro in the Stopwatch dropdown then click Start.
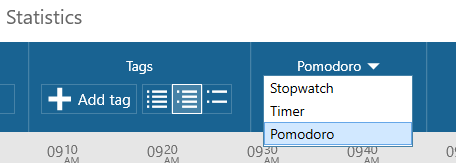
|
| Choose Pomodoro timer |
By default work interval will be 25 minutes long. You also need to select a tag. The idea of Pomodoro timer is knowing what you will be doing for those 25 minutes, so think about what you will accomplish in the next 25 minutes, choose your task and start working.
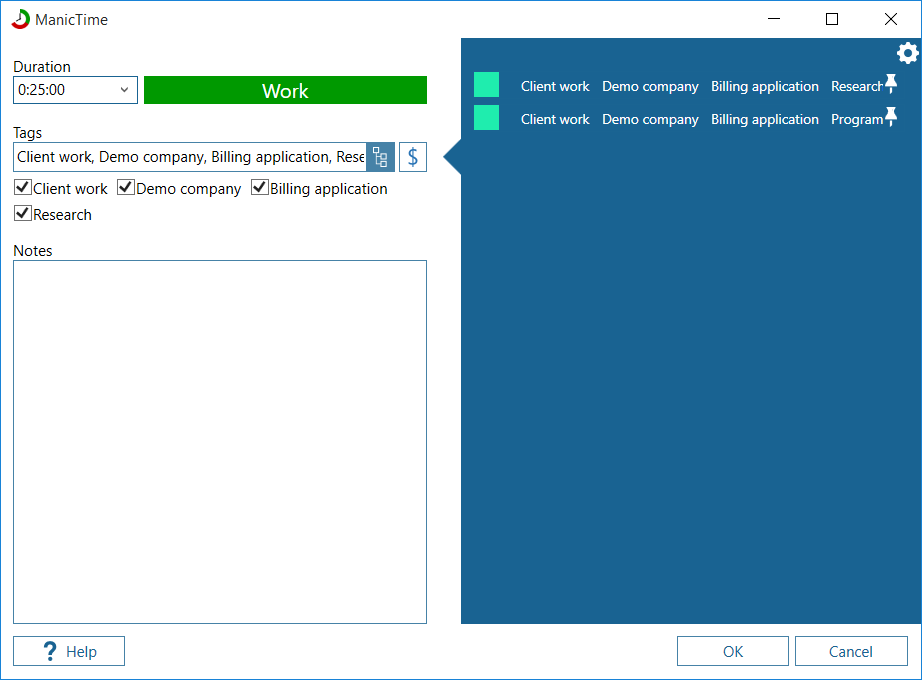
|
| Pomodoro timer work window |
After 25 minutes, a Break window will pop up. You have several options:
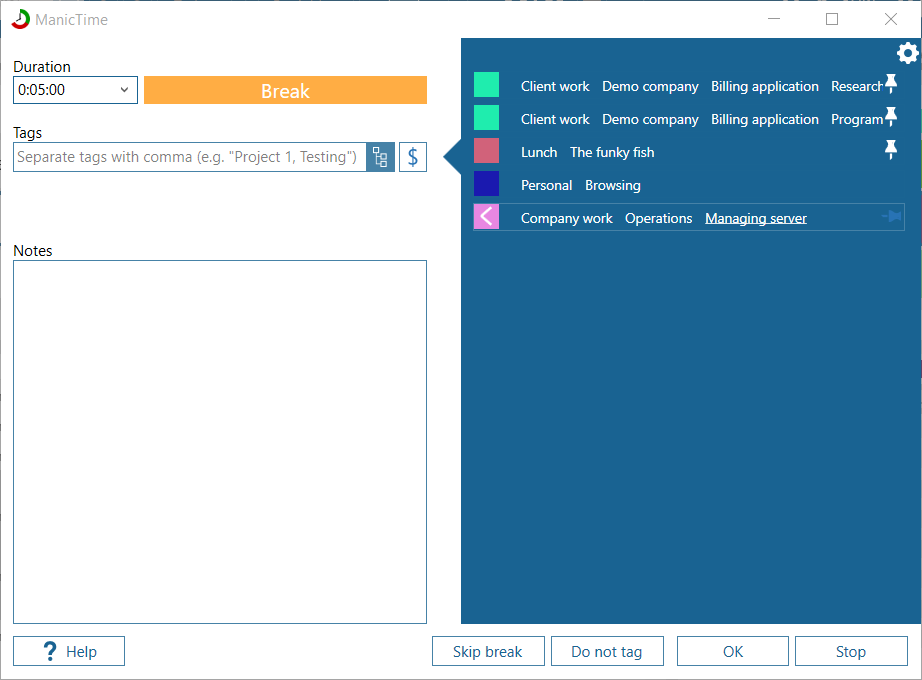
|
| Pomodoro timer break window |
- Ok - Choose a tag and continue, for example tag "Break"
- Skip break - continue working for another 25 minutes.
- Do not tag - start the break, but do not tag this time (maybe you don't know what you will be doing during the break and want to fill this time later).
- Stop - Stop Pomodoro
Pomodoro will stop once you click Stop or when one of the work-break windows is left unattended.
Exporting tags with usage details
Some customers want to export a report with their tags and all the data that was tracked at that time.
To get the report, go to Timesheet, create a report, then go to Usage details. The Details report outputs all activities with associated tags.

|
| Application timeline details with tags report |
External tag sources
Some of you already have tags defined in some other system. These can be issues on FreshBooks or Jira, or maybe todo list from any number of apps.
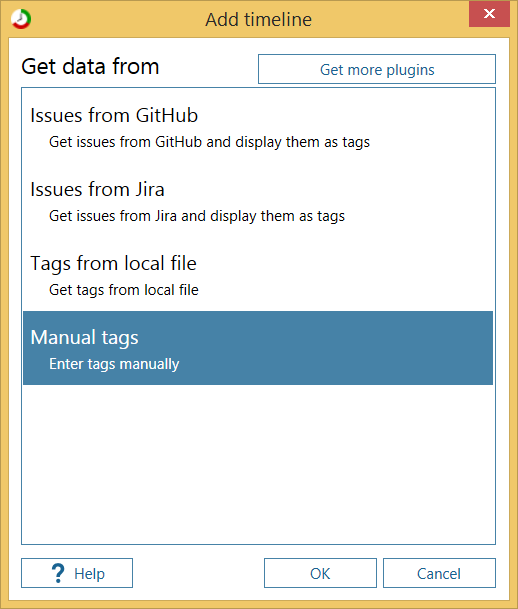
Currently you can add pre-existing tags from these sources:
- Import issues from Jira and present them as tags
- Import tasks from FreshBooks and present them as tags
- Import issues from GitHub and present them as tags
- Get them from local file
- You can enter them manually
Plugin system is public so you can make a plugin for any service you want. If you'd like to write your own, you can find a sample plugin on GitHub.
To add tags from other sources, open Tag editor -> Tag sources.
Local file and manual entry
Manual entry and local file work in the same way, so you can use the same syntax for both.
Put each tag group on its own line, tags are separated by comma.
Client 1, Project X, Activity 1
Client 2, Project Y, Activity 2
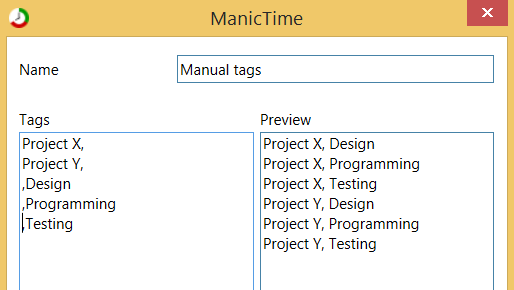
You can use partial tags for easier tag generation. Lets say each project has sub-tags Design, Programming, Testing. You can use:
Project X,
Project Y,
    ,Design
    ,Programming
    ,Testing
This will create the following tags:
Project X, Design
Project X, Programming
Project X, Testing
Project Y, Design
Project Y, Programming
Project Y, Testing
Import/Export tags
To export or import all your tags, use the Tag editor. Tags are exported to a .txt file, each tag combination is on its own line. You can also use exported text file as input for tag repository on the ManicTime Server.
"Some tags are hidden" notification in Add tag window
On ManicTime Server administrators can restrict which tags can be used. For example, let's say that these tags are allowed:
Client 1, Project X
Users can now use tags like
Client 1, Project X
Client 1, Project X, Activity 1
But they can not use tags like
Client 2
Client 2, Project Y
When you see a message "Some tags are hidden" in Add tag window, it means that some tags are not shown because of restrictions on ManicTime Server.
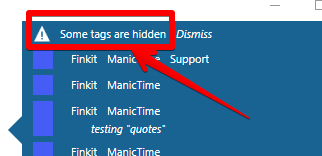
|
| "Some tags are hidden" notification |
Client 1, Project X, Jira tag 1
Client 1, Project X, Jira tag 2