Administration pages

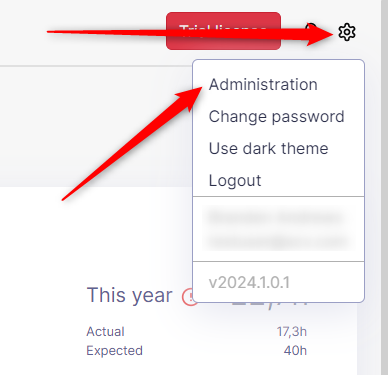
On server web pages click on the Administration link to get to the administration section.

Most of the settings have help descriptions on the right side.

General

Various display settings used throughout the site.

Site url - this is the URL which will be used in email reports. So this should be some public URL, which will point to this site, otherwise links in email reports won't work correctly.

Work time

Work time limits

Here you can set required presence and expected work time. These settings are applied on various charts on the site, like "Personal dashboard", "Overtime", "Start / end". You can set different work time settings for different users.

Work free days

Work free days are shown on various charts and are used for overtime calculation. Any work on a work free day is counted as overtime. To add work free days for your country, choose a country and work free days will be automatically populated.

Additional work days

You can use this settings do define additional work days, like working Saturday or Sunday. List of dates defined here will be treated as a normal work day. If the same day is on both "Work free days" and "Additional work day" lists, it will be treated as a working day ("Additional work days" list wins).

Day start shift

Day start shift allows you to tell ManicTime from when to when the day is counted. Similar to the feature in the client, a setting of 4 will make statistics count days from 4am to 4am. Useful if your users work through midnight

Active time

This setting allows you to change how Active time is calculated. By default, Active time is based on Computer usage. This means that for example Overtime is calculated as:

Overtime = 
(End time (last interaction with computer) 
- Start time (first interaction with computer)) 
- "Expected work time"

Active time can also be based on tags. Tags, which are NOT considered Active, are treated as Away. If a user came to work and worked on a tag which is considered as Away, it will look as if the user was not at work. If this is not desirable, design your tags accordingly. For example start all tags with "In office" or "Out of office".

This setting will affect all views where Active time is used - "Start / end", "Overtime", "Attendance"...

Allowed tags

Define server tags, which can then be used in the client. The most simple way is to just write all tag combinations, each on its own line. For example:

Client 1, Project X, Activity 1
Client 2, Project Y, Activity 2

You can restrict some tags to specific users. For example to restrict tags to specific teams, use , for specific users use []:

Tag, For all
[doman\user2, domain\user1]
Tag, Some users
{team1, team2}
Tag, Some teams

You can also use partial tags for easier tag generation. Lets say each project has sub-tags Design, Programming, Testing. You can use:

Project X,
Project Y,
,Design
,Programming
,Testing

Above example will create the following tags:

Project X, Design
Project X, Programming
Project X, Testing
Project Y, Design
Project Y, Programming
Project Y, Testing
  

When you define server tags, ManicTime will only allow tags defined on the server. Users will not be able to write their own tags.

You can deploy ManicTime clients with settings for server and how to treat server tags. So you can for example deploy clients which will connect to the server and download tags automatically.

Updating server tags automatically

You have two options to update server tags automatically from other systems, via a web service or via file.

Edit tags via web service

Web service can be used in combination with Manual tags. Tags from web service will overwrite all previous tags. You can then modify them in editor, but next update from web service will again overwrite any changes.

To see how web service works we suggest you take a look at a sample we created.

Edit tags via file

Go to Tags -> Edit tags on ManicTimeServer.

Set a full path to a file which contains tags. For example:
c:\manictime\tags.txt

ManicTime server will update tags automatically when the file changes.

Within file you can use the same text as described above.

You can also use the file, which is the result of Export in ManicTime client (Tag Editor -> Export)

Screenshots

Enable screenshots and set the folder where they should be saved. If you have a lot of users, choose a hard drive with a lot of free disk space.

Server screenshot settings

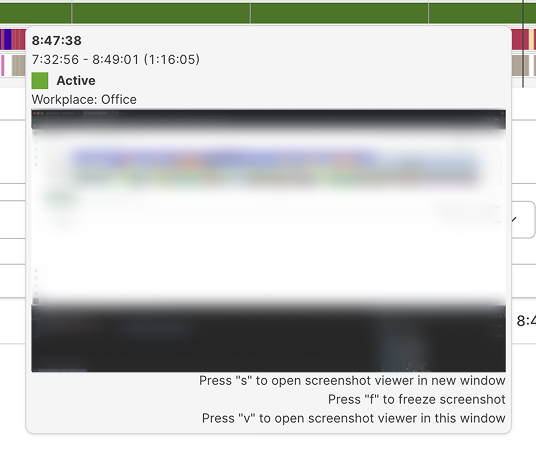
You can also choose to have the screenshots blurred. If you use this feature, screenshots will be blurred before ManicTime sends them to the server. The idea of blurred screenshot is that text is unreadable, but you still have a sense of what screenshot represents. You can do this in Administration, Client settings

Once you are done with the settings, you also have to configure the client to start sending screenshots to the server. On ManicTime client (v4.1 or later), go to Edit server, Publish tab and check Publish screenshots.

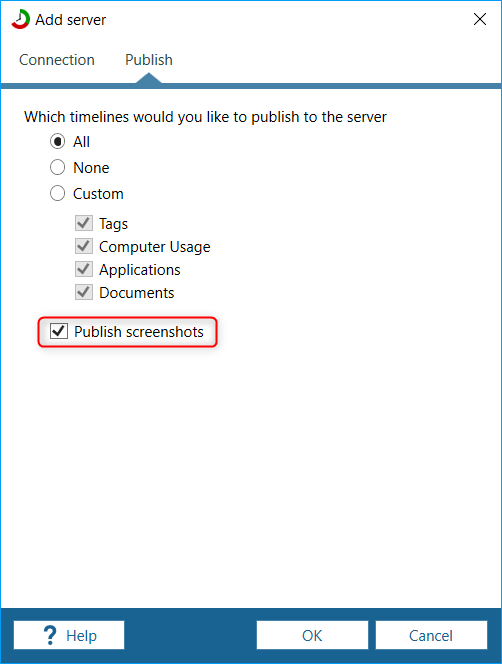
Configure ManicTime to send screenshots to the server

Also make sure, that sending screenshots is enabled in Administration -> Client settings.

Usage

You can view the screenshots on Personal -> Day view or on Reports -> Timelines. If you mouse over the timelines, screenshot will show up in the tooltip.
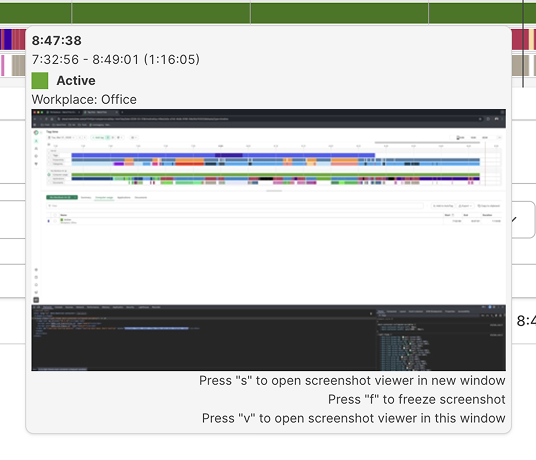
Screenshot in tooltip Screenshot in tooltip - blurred

You can also look at the files with some other image viewer, all the images are now on the server in the folder you specified.

Disk usage

In Administration -> Diagnostics, you can see how much disk space is used by screenshots.

License

The license will also be used on all connected clients. If you update it, it will update on all clients as well.

Users

A list of all users, who are using this server. If you delete a user, all his/her data will be deleted as well.

Get all names from AD will try to get users names from AD. These names are then used instead of usernames.

Archived Users

Archived user:

  • doesn't need a license
  • can't send data to the server
  • can't login on the server
  • if user had data for the chosen time period, user will be included in reports

You can archive or unarchive users from the Users menu in Administration.

Archived administrator can still login to the server and manage settings, but can't view any reports.

With Windows authentication, users are created automatically when they send data or visit the server. If there are no more free licenses, new users will be created with status Archived.

Archived users and license quantity

Archived users do not need a license, so we suggest you archive users, who are no longer sending data to the server, so that you do not pay for unnecessary licenses.

Permissions

Roles are groups with added security settings. Available roles:

  • Administrator - have access to server settings as well as all the data on the server.
  • Content reader - can see all data, but does not have access to admin pages
  • Content reader [team] - a content reader role will be created for each team. Members will see all data of users in that team.
  • Regular user - by default all users are in this role. They only have access to their own data and can't change any of the admin settings.

By default the user who installs the server will also be an Admin on the server. You can also add admins via command line.

Teams

If your organization has a large number of users, you can use Teams to group them.

When a user visits the server it will authenticate with Windows authentication. At that point user will also be visible under Users tab in Admin section.

You can also add users before they visited the server. On the create team window you can manually add users (place each user on its own line).

Email and Email reports

ManicTime Server can send weekly, monthly and yearly email reports. You can configure email reports to send an email for the whole organization or just specific team.
All values in the report link back to the site, so you can do further analysis.

Shared reports

Read more about Shared reports.

Configuration file

Read more about Configuration file.

Client settings

Read more about Client settings.

Connected devices

This view will show you all devices which are sending data to the server.

Diagnostics

Any errors which occur while processing data and generating statistics will be reported here.