This article only applies if you are hosting ManicTime Server yourself. On ManicTime Cloud connection is already configured.
Creating connection to Jira Cloud
Before users can make a connection to Jira to get issues, ManicTime Server needs to be connected to Jira.
You can use Jira Cloud or Jira on premise server(Data center). The configuration varies slightly between the two.
Jira Cloud
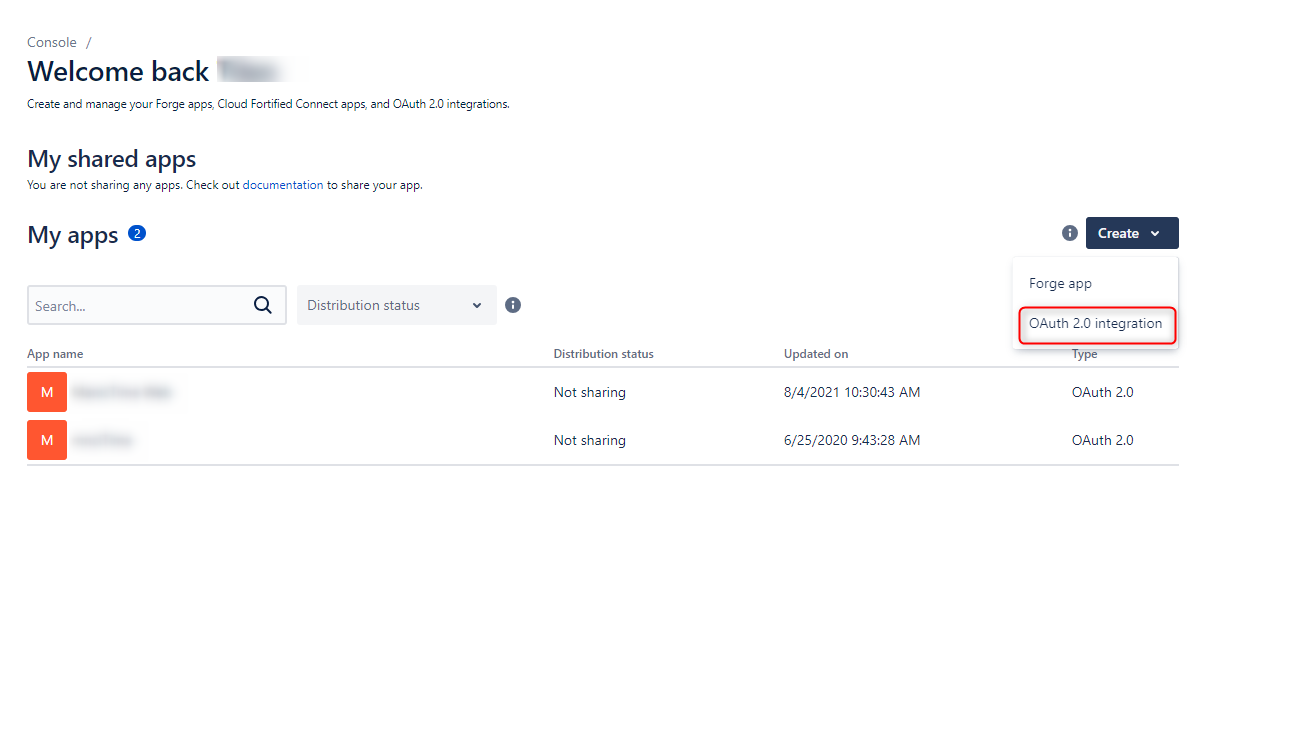
1. On Jira, go to Jira developer console.
Then click on the Create and OAuth 2.0 integration.
 |
| Jira developer console |
2. Fill the name field
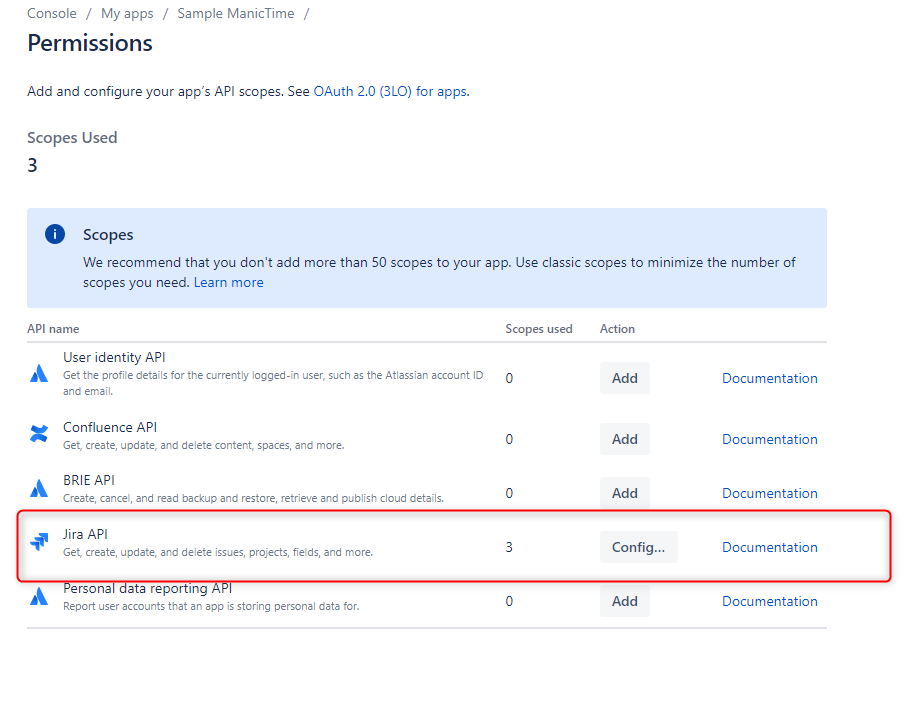
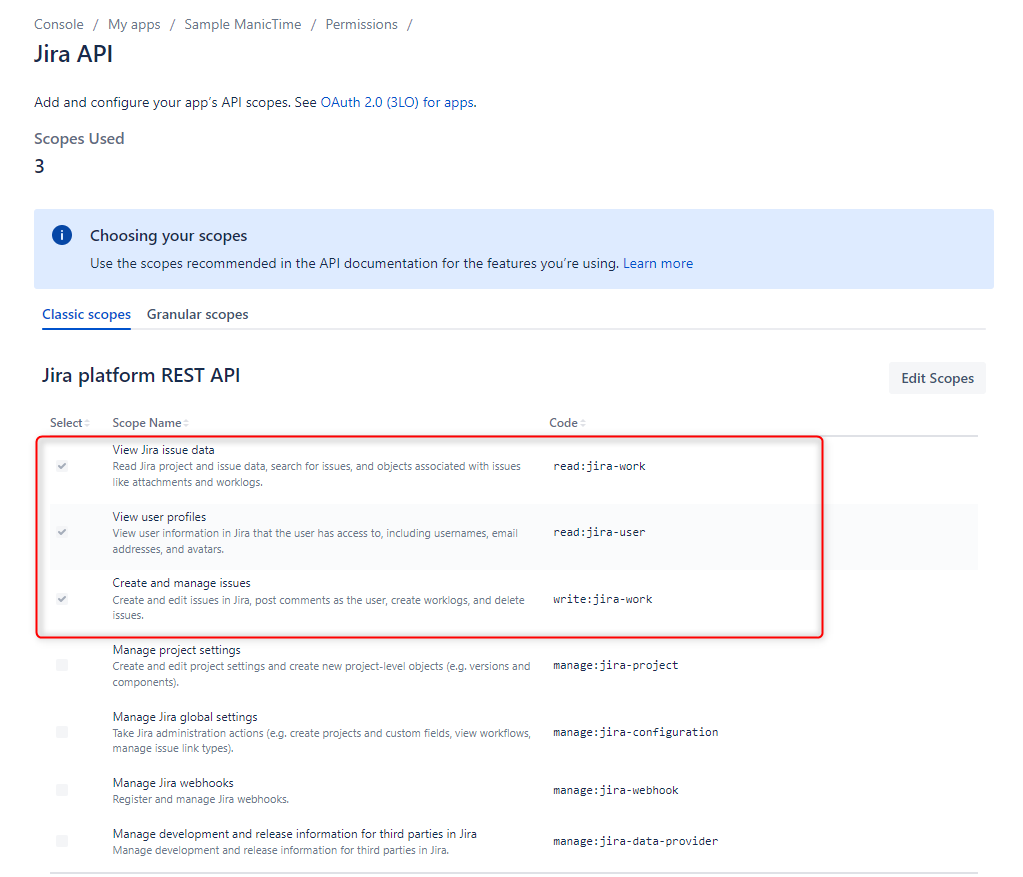
3. For Permissions you need to add Scopes for Jira API.
Required scopes are:
- View Jira issue data
- View user profiles
- Create and manage issues
 |
| Permissions tab |
 |
| Needed scopes |
4. You will need to to get Authorization callback ur from ManicTIme Server
To get the Authorization callback url for the callback Url field in Authorization Tab, go back to ManicTime server, Administration and under Jira configuration, you will see a list of possible Redirect Uris.
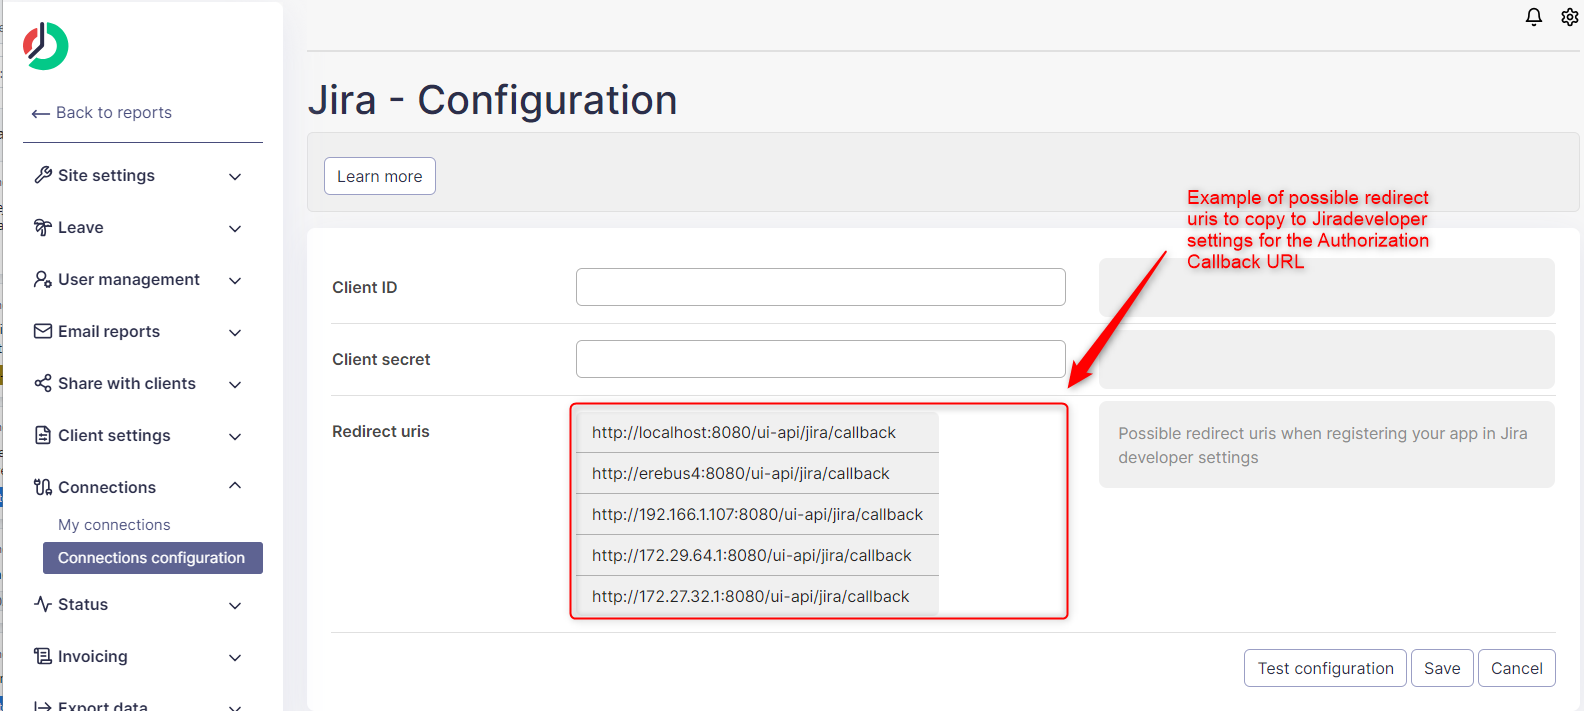 |
| Possible redirect Uris |
5. Copy one of them to Jira Callback URL field.
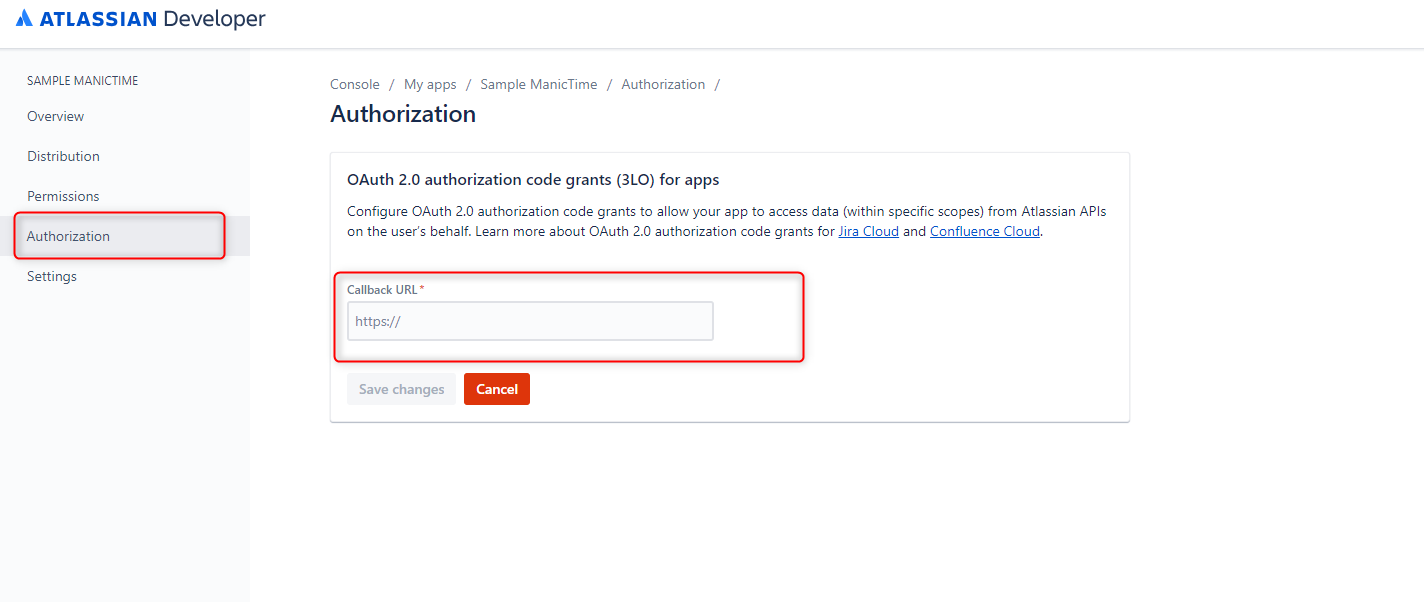 |
| Jira Authorization |
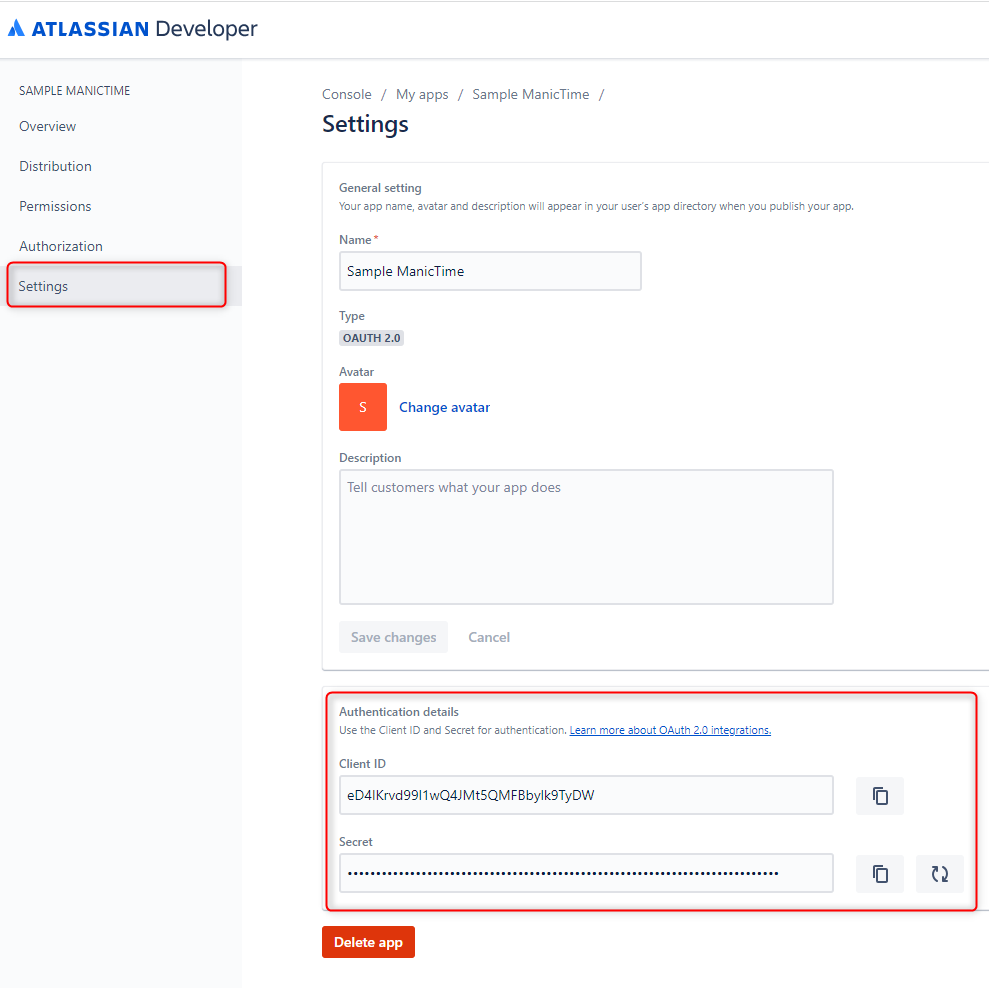
6. Go to settings tab where you will see client Id and secret.
 |
| Jira Client Id and Secret fields |
7. Copy Client ID and secret to ManicTime Server Jira Connection Configuration screen.
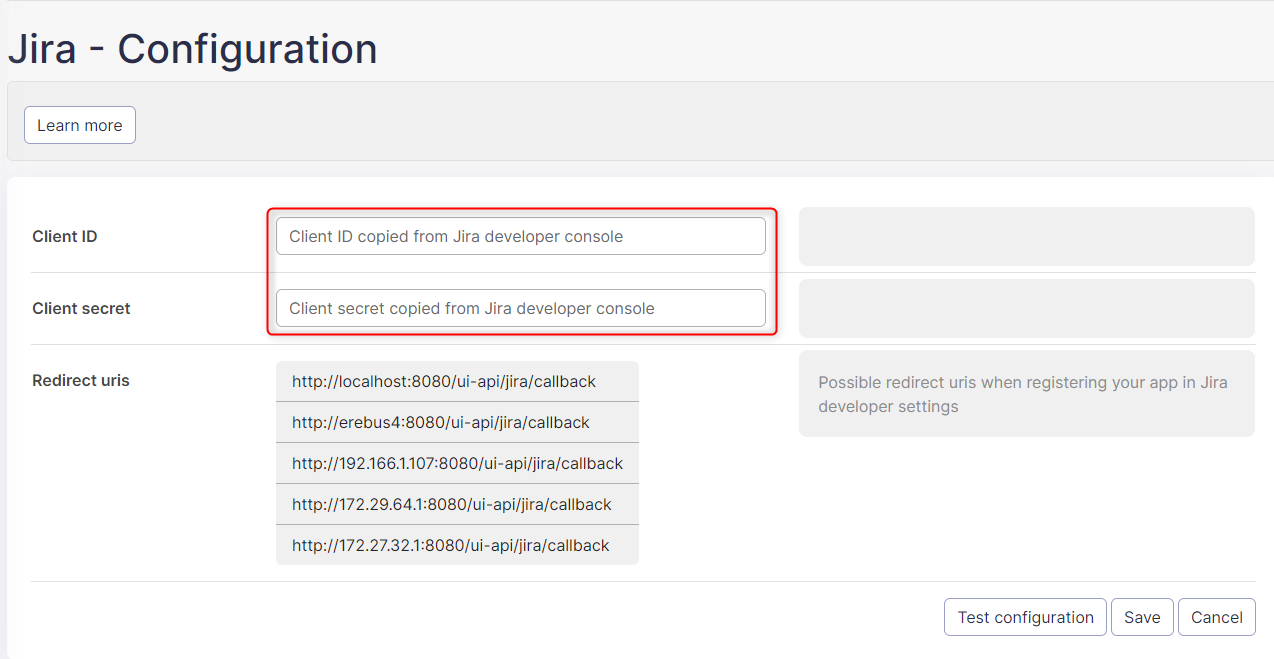 |
| Copy Client Id and Secret to ManicTime Server Jira Configuration screen |
8. Click "Test connection" to see if the connection is set properly, then save it.
When you click "Test connection", you will go through the authentication process, like all users who will try to connect to Jira.
Creating connection to Jira on premise
This only applies if you are hosting ManicTime Server yourself. You cannot connect to on premise Jira server, if you are using ManicTime Cloud.
1. You need to check if you have HTTPS Enabled on your Jira Server and ManicTime Server.
If you do not, you need to change 2 OAuth 2.0 provider system properties :
- atlassian.oauth2.provider.skip.base.url.https.requirement
- atlassian.oauth2.provider.skip.redirect.url.https.requirement
Set both to true.
More about these settings https://confluence.atlassian.com/adminjiraserver/oauth-2-0-provider-system-properties-1115659073.html
How to do that, you can read more about here https://confluence.atlassian.com/adminjiraserver/setting-properties-and-options-on-startup-938847831.html
We succefully changed this two settings with "Setting properties for Windows Services via command line"
2. On Jira Server you need to configure incoming link:
You can read how to do this on https://confluence.atlassian.com/adminjiraserver/configure-an-incoming-link-1115659067.html
To get the Redirect URL go to ManicTime server, Administration and under Jira configuration, you will see a list of possible Redirect Uris.
|
| Possible redirect Uris |
- For The Application permissions you need to select Write permission. Then you will see a Client ID and Client secret that you will copy later to ManicTime Server Jira Connection Configuration screen
3. Fill the reuried filds in ManicTime Server Jira Connection Configuration screen
For Server url you need to enter your Jira server url, for example https://mydomain.atlassian.net or https://myjiraserver.com
Copy Client ID and secret from Jira incoming link credentials.
|
| Copy Client Id and Secret to ManicTime Server Jira Configuration screen |
4. Click "Test connection" to see if the connection is set properly, then save it.
When you click "Test connection", you will go through the authentication process, like all users who will try to connect to Jira.
Editing or deleting configuration
Any changes to Client Id or Secret will delete existing connections for all users.
If you delete the configuration all users data will be also deleted.
Connection settings
In the Jira configuration settings, you have the ability to control the visibility of issues for users. You can set up various filters to determine which issues a user can see. These filters can be based issue states (opened or resolved), time frames (e.g., issues closed in the last X days) and assignment to users.
One important setting in Jira is the "Authenticated user" setting. This refers to a specific user account that is used to authenticate and query data from Jira. This user should have access to all projects you want to import issues from.
Users then need to go to Administration -> My connections and authenticate with Jira, and the tags should be visible in the add tag window.
Syncing time with Jira
Please note that users must use tags that came from Jira to successfully send tags back to Jira.
This connection also has the ability to send tags back to Jira as worklogs. You can enable this feature in Connection settings. The user needs to use tags from Jira and then they are automatically sent back to Jira every 2 hours or you can send tags to Jira manually, if you click the Sync now button. The connection can send tags for a maximum of 30 days back. Tags are assigned to the Jira user that corresponds to the ManicTime user who created the Jira tag.
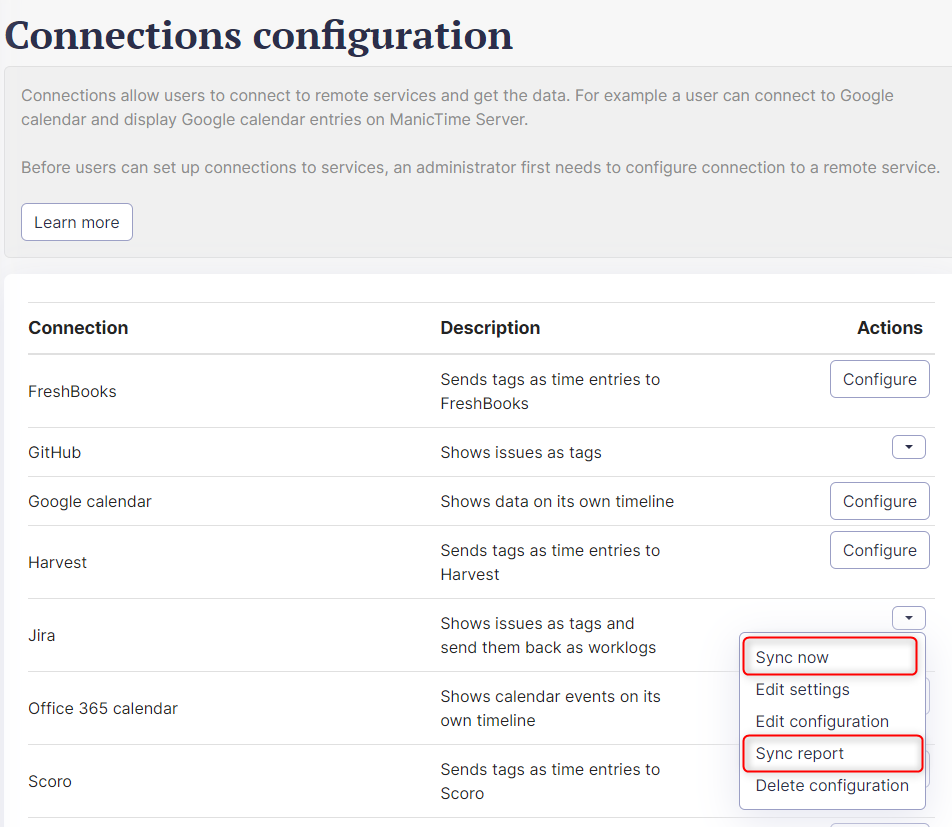 |
| Sync now and Sync reports buttons |
You can also see status of the synced tags, if you click Sync reports where you have a summary for every sync. If you click on it you have a detailed report for synced tags.
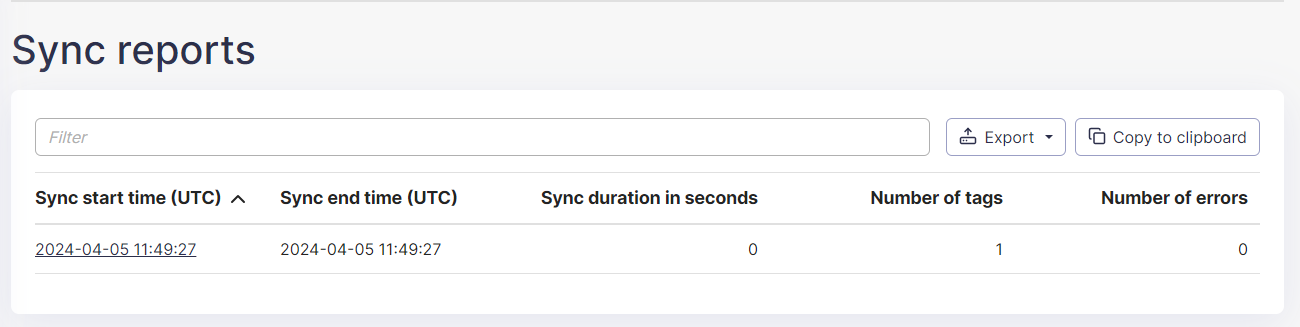 |
| Sync reports |
 |
| Sync report |