Setting up ManicTime on a Terminal Server
A Terminal Server is a great fit for ManicTime, because many users share the same machine and ManicTime can automatically track each of them under their own Windows account.
In this guide we'll install ManicTime Server on the same Terminal Server, which keeps the setup simple. At the end of the article we describe what is different when ManicTime Server runs on a separate machine.
Step 1: Install PostgreSQL (recommended)
If your Terminal Server has more than 5 users, we recommend PostgreSQL as the database. If you already have PostgreSQL or MS SQL running elsewhere, you can use that. Otherwise, PostgreSQL is free and works very well for this purpose.
Download PostgreSQL for Windows from https://www.postgresql.org/download/ and run the installer. During installation you will set a password for the postgres user, which you will need during ManicTime Server setup.
More about which database to choose
Step 2: Install ManicTime Server
- Download and run the ManicTime Server setup.
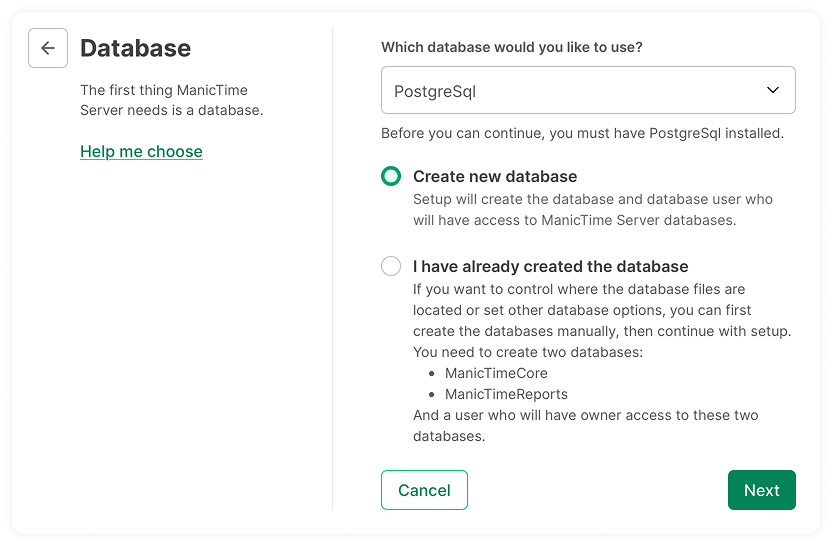
- When prompted to configure the database, choose PostgreSQL.
- Use the default
postgresuser and the password you set during the PostgreSQL install. This is only used to create the ManicTime database and user. - Set a password for the new database user that ManicTime Server will use to access the database.
While going through the rest of the setup, also make these changes:
- For authentication, choose Windows users.
- Add an admin account to manage ManicTime Server.
- For license choose Trial (you can enter a real license later).
Once the setup completes, you should be able to access the server at:
http://localhost:8080
If it does not start, open a console in c:\Program Files\ManicTimeServer and run:
ManicTimeServer start
Learn more about installing on Windows
Step 3: Create a deployment file for ManicTime clients
Because every user on a Terminal Server gets the same installation of ManicTime, the easiest way to point all of them at ManicTime Server is to create a deployment file.
Open the server in a browser and go to Administration (gear icon in the top-right), then Client settings -> Deployment file.
Set the Server URL. If the server is on the same Terminal Server, use:
http://localhost:8080Click Create deployment file.
The downloaded ManicTimeTrackerSettings.json file will look like this:
{
    "_override": "forbid",
    "server": {
        "url": "http://localhost:8080"
    }
}
Step 4: Install ManicTime client for all users
On a Terminal Server you want ManicTime to start for every user that logs in, not just the user who ran the installer. To make sure of this, download the following files:
- ManicTime Client .msi setup file, which you can get here.
ManicTimeSetup.ini, which you can get from https://cdn.manictime.com/setup/custom/ManicTimeSetup.ini.
Place these files in the same folder together with the ManicTimeTrackerSettings.json from Step 3. The folder should now contain:
manictime-setup-[version].msiManicTimeSetup.iniManicTimeTrackerSettings.json
Now double-click the .msi file to install. The installer will:
Copy ManicTime client files to
c:\Program Files\ManicTimeCopy
ManicTimeTrackerSettings.jsontoc:\Program Files\ManicTimeAdd a registry key to start ManicTime for all users when they log in:
HKEY_LOCAL_MACHINE\Software\Microsoft\Windows\CurrentVersion\Run
Note: If you already installed the ManicTime client without
ManicTimeSetup.iniand just want to make it run for all users, you can run this registry file:https://cdn.manictime.com/setup/custom/ManicTime_Run_For_All.reg
That's it
Whenever a user now logs into the Terminal Server, ManicTime will start automatically and begin sending data to the server.
What if ManicTime Server is on a different machine?
The steps are mostly the same, but the server URL in the deployment file must be accessible from the Terminal Server. In this case you cannot use localhost:8080.
Instead, use the network machine name, for example:
http://machine1:8080
Additionally, both the Terminal Server and the machine running ManicTime Server should be in the same domain. This ensures that Windows users on the Terminal Server can authenticate against ManicTime Server and send data automatically.
Anonymizing data on a Terminal Server
If you don't want each Windows account on the Terminal Server to appear as a separate ManicTime user (for example, when many people share a single Windows account, or when you don't want to track individuals), create the deployment file with Data is sent as -> Following user. All clients on the Terminal Server will then send data under the same user.
How many licenses do you need?
ManicTime licenses are per user, so you need a license for each person using ManicTime Server. This includes:
- Every administrator who manages the server.
- Every user whose data is being tracked and sent to the server.
To check current pricing, enter the number of users here.